A better way to attach collar and button stand
https://www.youtube.com/watch?v=Wc8qJtMUSyk
Button hole
On a Singer Heavy Duty https://www.youtube.com/watch?v=2YoKu6hTzq8
- Pop the button into the button hole foot.
- Take off standard presser foot and attach button hole foot.
- Pull down the little white lever on the left side (with the arrow saying “PUSH”). Pull it all the way down. Then push it towards the back.
- Adjust the tension to a slightly lower setting, e.g. 3, to pull the top stitching more to the back.
- Set stitch width all the way to 6.
- Set stitch length to the button hole setting (between 0 and 1, but much more towards 0, last notch before 0).
- Select button hole stitch from the stitch selection dial.
- The starting point of the button hole is the lower point of the button hole. It will stitch the button hole away from you (towards the back of the machine), on the left leg of the button hole first.
- Once you’ve reached all the way around, let it stitch a few more tack stitches, then stop.
- For the next button hole, make sure to pull down the white lever again and press it to the back.
Lining
Lining any garment
https://www.youtube.com/watch?v=THRwKlsfvLA
- Cut out the same pieces of lining as of shell fabric.
- Trim (shorten) the following lining pieces by 0.5 cm:
- neckline
- armholes (if no sleeves)
- cuffs (if sleeves)
- length of the pieces (waist or hem). This will ensure that the shell fabric will be pulled inside a bit by the shortened lining, and the lining will not peek out.
- Sew all the shell pieces and all the lining pieces together, so you have two identical sides of the garment.
- Join lining and shell:
- Make sure right sides of the two pieces are facing each other.
- Make sure your seams correspond. Start at centre back, then match up the shoulder seams. Then proceed to front neckline.
- Follow the neckline and pin lining and shell together. Make sure the edges of the two pieces are flush, despite the fact that the lining is a bit shorter.
- Find your ease and distribute evenly.
- Sew around the neckline and part of your hem/waist.
- Understitch the seam allowance in the neckline
- Sew as far as possible with the machine, but leave a hole to turn everything the right side out. Sew the very last bit by hand.
Lining or relining a skirt
https://www.youtube.com/watch?v=2UCCdsTlcJQ
Fitting & adjusting
- Always fit from the top down! First length of waist, then scroop of crotch, then crotch length etc.
- Fit one thing at a time and try on in between!
Crotch curve
If “comma”-shaped lines around crotch and bluging fabric ⇒ too much fabric, scooping out of crotch curve needed.
If “whiskers”-shaped lines pointing towards crotch or butt and tightness when walking ⇒ too little fabric, more space is needed in the front/back crotch curve. Make the crotch curve more shallow.
Too tight in butt, draglines across butt pointing straight at crotch ⇒ crotchline not scooped out enough
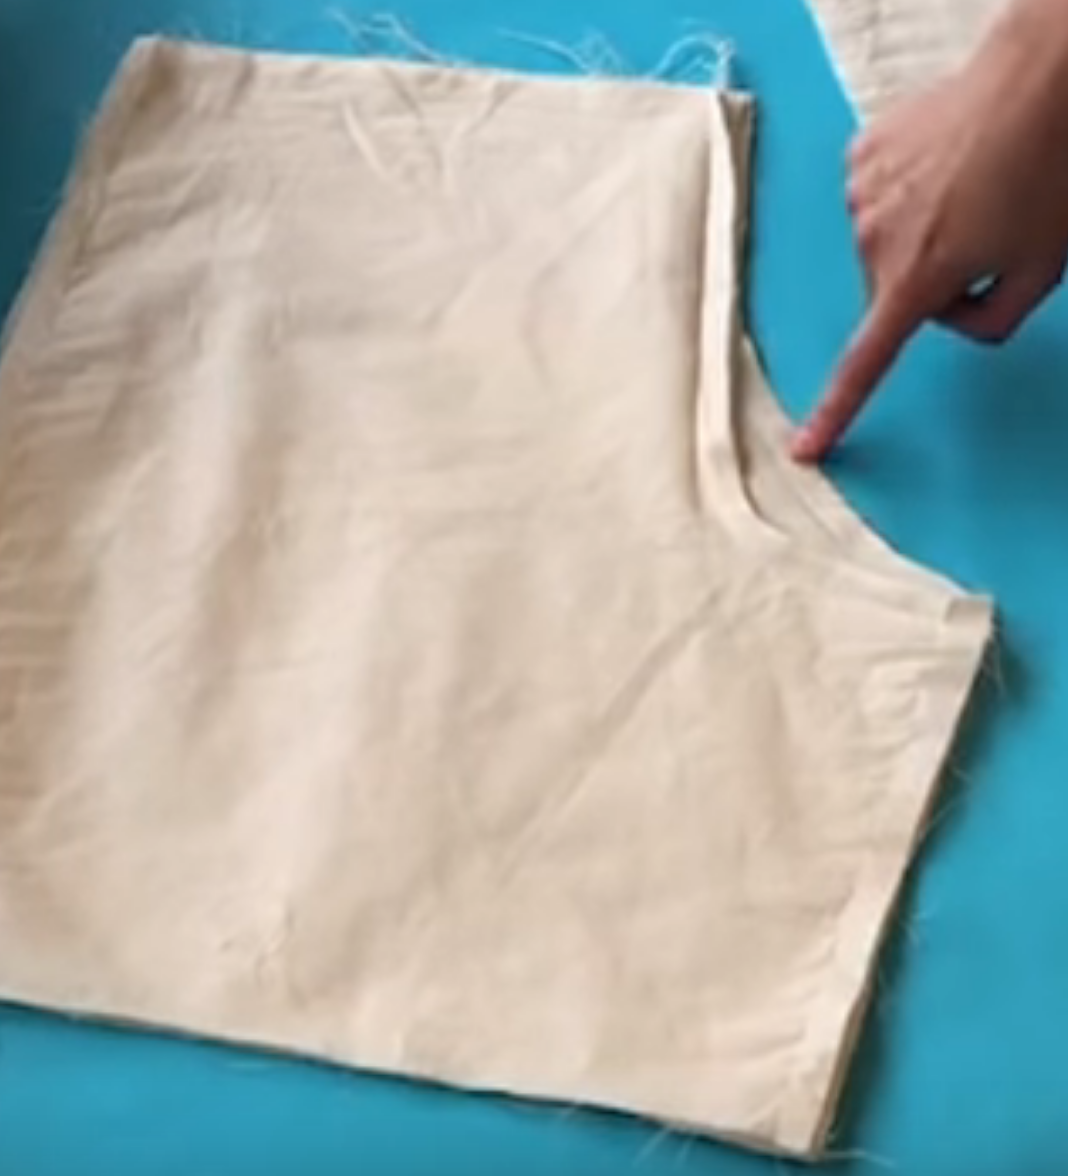 Top: well-fitting trousers; bottom: too tight around butt. Solution: scoop out crotchline more (Credit: Melly Sews https://www.youtube.com/watch?v=JyH7QzfWmzo)
If you scoop out a lot (i.e. more than 1 cm), add that to the outside at the hip!
Crotch point should sit nicely in the middle of your crotch. If you feel like you need to pull the trousers backwards or forwards to make them fit well, you probably need to adjust the crotch curve.
If It either fits when you pull it towards the back or towards the front, but not both ⇒ extend crotch curve slightly on either the front or the back piece. If you pull it towards the front and it fits, but then the crotch point is too far forward, it needs extension on the front piece. Vice versa for the back piece.
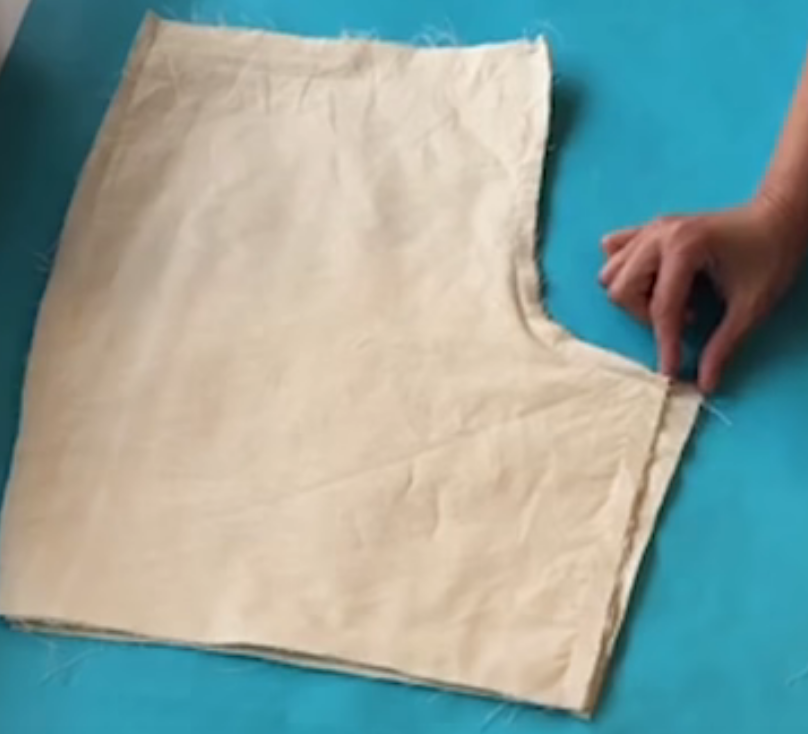 Bottom piece: extended crotch curve to fit better and give you more length in the crotch (Credit: Melly Sews https://www.youtube.com/watch?v=JyH7QzfWmzo)