https://openstudiopatterns.com/patterns/p/shop-pant Open Studio Patterns
Suggested fabrics
The Shop Pant works best in at least an 8 oz. woven bottom weight fabric. You could choose something with stretch, but it’s not necessary. Canvas, denim, duck and most twills are a good option.
Tutorial
Youtube: https://youtu.be/DXlssllVSVE
Pictures
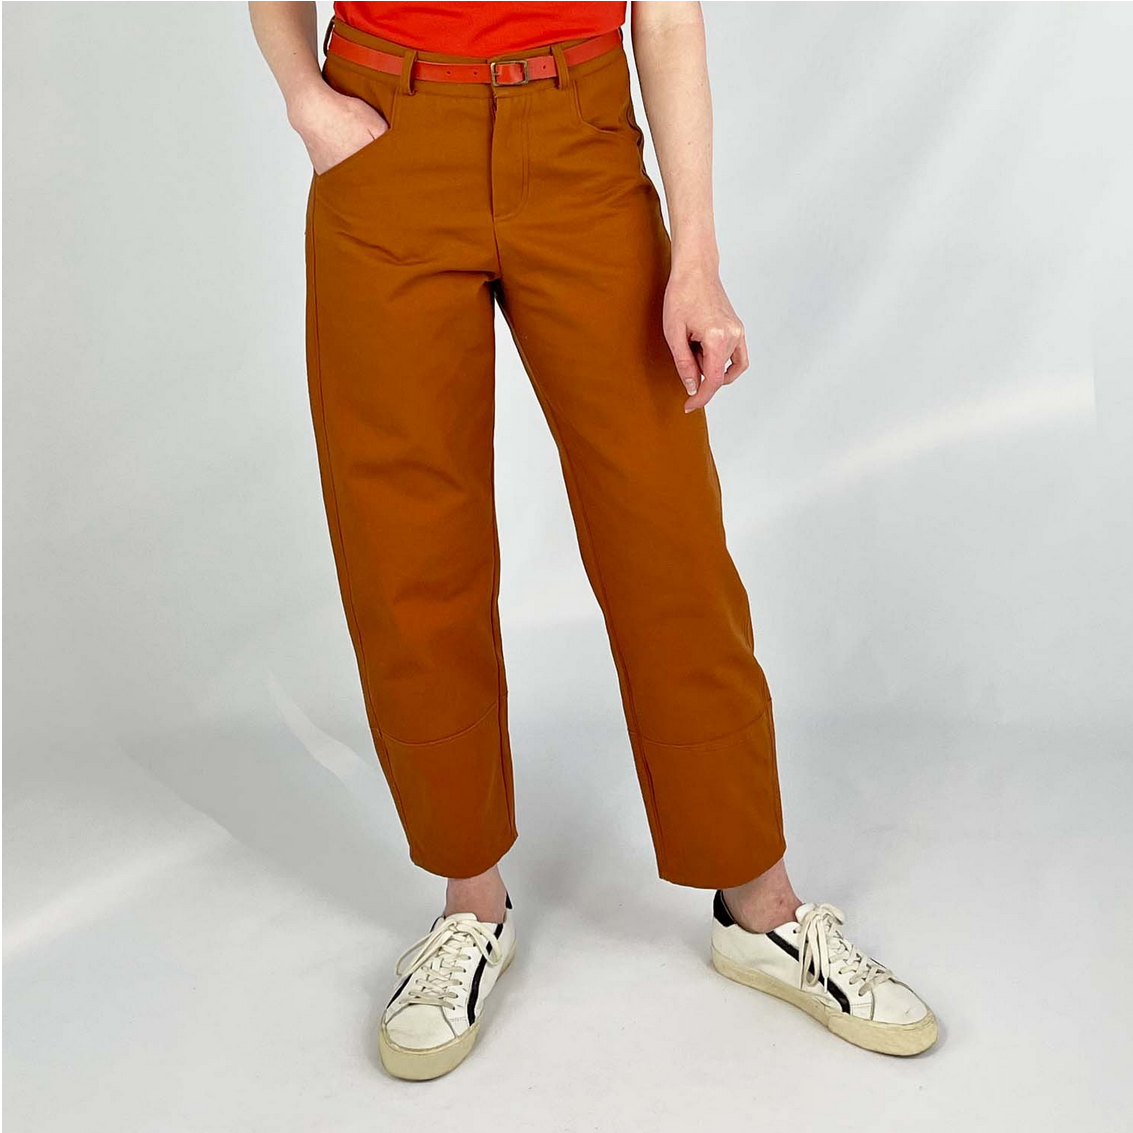 (Credit: Open Studio Patterns https://openstudiopatterns.com/patterns/p/shop-pant)
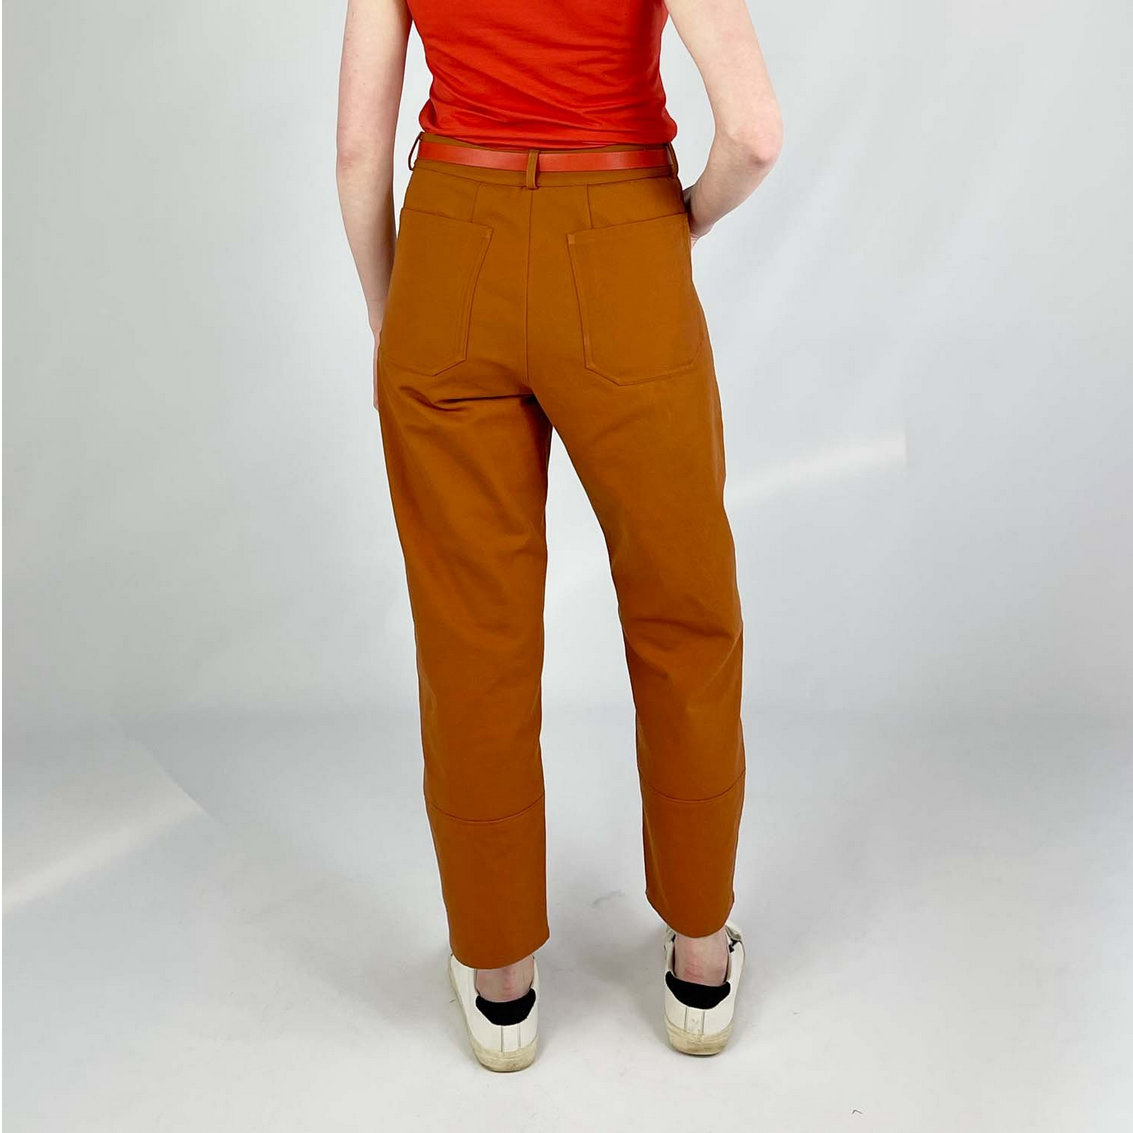 (Credit: Open Studio Patterns https://openstudiopatterns.com/patterns/p/shop-pant)
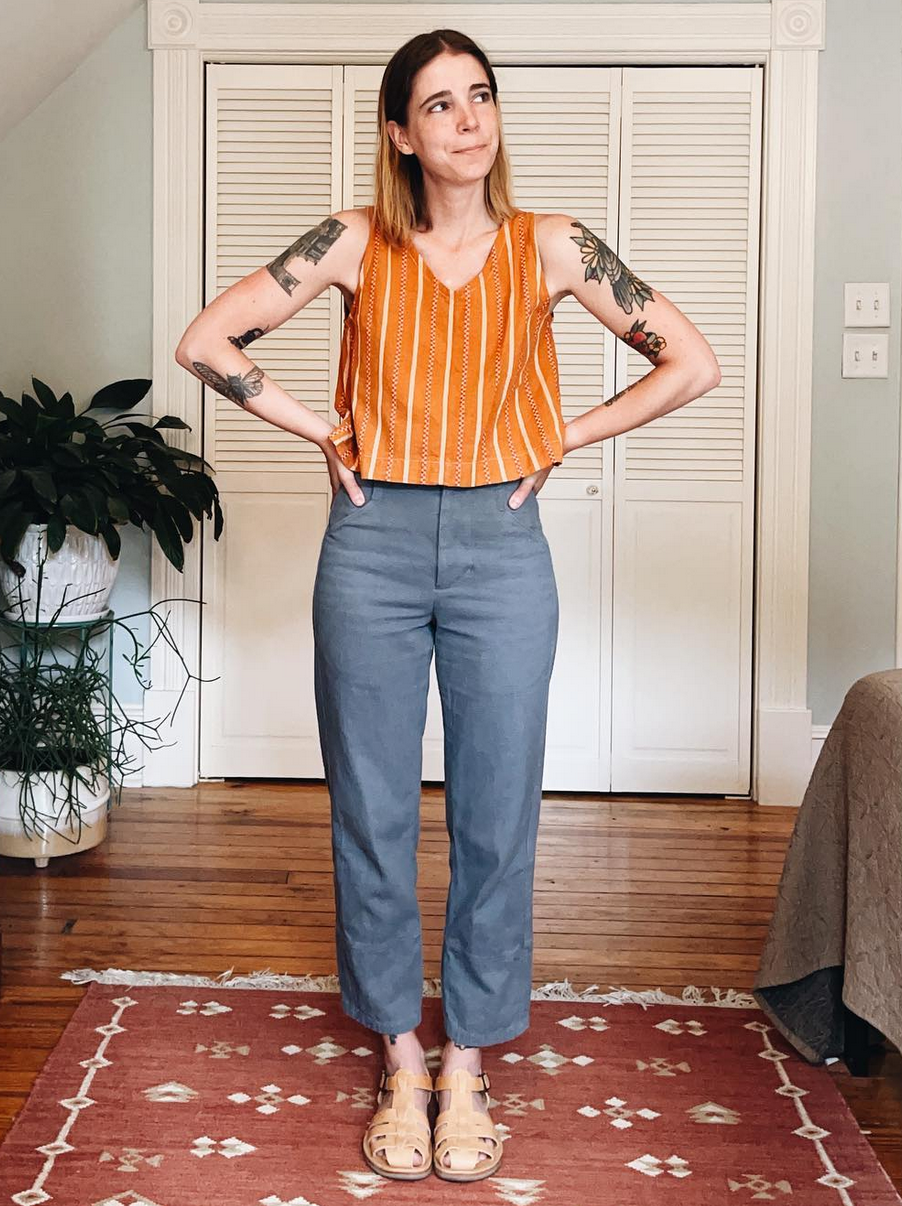 (Credit: @enderallsews https://www.instagram.com/p/CdWHMFCukPc/)
Sewing progression
Youtube tutorial: https://www.youtube.com/watch?v=DXlssllVSVE
0.5” / 1.27 cm seam allowance, unless otherwise mentioned
Prepare the fabric pieces
- Iron on interfacing on pieces 10 and 11 (and optionally also 8 and 9).
Leg pieces
- Attach bottom pieces (Front hem, pieces 5; Back hem, pieces 4) of legs to all 4 legs (pieces 1, 2 and 3) - right sides together. Match the notches.
- Overlock the seams together, then press the seam allowances towards the bottom of the trouser leg.
- Top stitch on the right side of the trouser legs at 0.25”/0.6 cm away from the seam on top of the seam allowance. Use a slightly longer stitch length than for the normal sewing.
- Sew the darts on the back leg pieces and press towards the side seams.
- Overlock the inside rise of the front legs.
- Overlock the inside rise of the back legs.
- Overlock the inside of the front and back legs.
Pockets
- Overlock the shortest and the longest sides (i.e. the interior edges) of Front Pocket Facing (pieces 6).
- Stitch the wrong side of piece 6 to right side (i.e. the nice patterned side that you want on the inside of the pockets in the end) of Pocket Bags (pieces 7) along the serged edges with 0.6 cm seam allowance.
- Right sides together, align the pocket bags with the front trouser legs, stitch with 1 cm seam allowance. Pivot the needle in the corner to get a sharp edge. When finished stitching, clip the sharp point for clean turning.
- Press the seams of the pocket bag open and turn the pocket bags. Then top stitch at 0.3 cm from the finished edge through both layers, sandwiching the seam allowance in between those layers.
- Overlock the lower, rounded edges of the pocket bag together to close the pocket bag.
- Then, fold the pocket bag in on itself and align with the outer edge of the front leg. Align notches, Stay stitch on the top (waist) and the side (hip) at the pocket opening, for about 4 cm. Don’t stitch over the pocket opening though!
- Topstitch a little 0.6 cm wide rectangle on short end of the pocket opening through all layers of fabric. This is to hold the pocket down so it doesn’t flip inside out later.
Back pockets
- Fold over the top of the back pockets by 1.9 cm, press. Fold over again by 1.9 cm, press.
- Topstitch the folded-over hem 0.3 cm from the inner edge.
- Overlock the other sides of the back pockets, fold over by 0.9 cm, press.
- Line up one of the back pockets with the marks on the back legs and top stitch 0.3 cm from the edge to the back leg. Reinforce the openings by sewing a little triangle.
- Pin on the second back pocket on the trouser leg. Before sewing on the second back pocket, make triple sure that they line up, even after the two back legs are sewn together!
Fly and zipper
- Fold fly extension (piece 8) right sides together in half and stitch the bottom closed with 1.27 cm seam allowance. Clip the corner and fold inside out.
- Press the fly extension and sew the raw edge closed with 0.6 cm seam allowance. Overlock the raw edge.
- Fly front (piece 9): overlock the curved edge.
- Place right and left front legs right sides together on top of each other (there will be a little overhang on the right leg, which is normal). Stitch the rise at 1.27 cm seam allowance up to the drill hole marked on the right leg pattern piece. Follow the piece without overhang for the seam allowance. Press the seam open.
- On the fly extension: Make sure you mark the the notch towards the bottom on the unserged short end. Line up the zipper (right side up) so the zipper stop is where this notch is. Line up the zipper tape with the serged edge of the fly extension (align top of zipper on the serged short edge) and stay stitch to keep the zipper in place.
- With right sides together, stitch the fly extension to the right leg, 1.27 cm from serged edge. Stop at the end of the zipper end, approx. 1.5 cm before the end of the fly extension.
- Fold the fly extension open and press the seam allowance towards the side of the trouser leg. Then top stitch along the zipper and stop again 1.5 cm before the end of the fly extension.
- Fly front: with right sides together, sew onto the left leg with 1.27 cm seam allowance, all the way (as much as possible) to the end of the fly front. Then press the seams open and press the fly front onto the inside of the leg.
- Open the zipper and stitch it right side to the right side of the fly front. NB: The zipper teeth must be 1.27 cm away from the edge of the fly front. Don’t line up the fly front flush with the opposite side of the zipper opening, it should overlap a bit. Make sure to align the waistline of both legs. _Tip: Use magic tape to glue the zipper to the fabric and see if everything lines up nicely. _
- On the outside of the left leg, draw a nice J-curve (using the fly front patttern) from the waste band to the end of the zipper. The drawn J-curve should follow the fly front on the inside, about 0.6 cm away from its edge. Pin the fly extension out of the way on the inside to not stitch over it. Then stitch on the outside with a fairly long straight stitch (too short doesn’t look good!) along the drawn curve. Use the handwheel to get around the curve nicely. The J-curve ends by stitching just about across the whole zipper end.
- On the inside, move the fly extension over the fly front. Then on the outside, make a little bartack to keep the fly extension in place.
Assemble legs
- Back legs: with right sides together at the rise, stitch with 1.27 cm seam allowance. Press the seam allowances apart.
- Back + front legs: with right sides together, stitch the outside seams with 1.27 cm seam allowance. Make sure to line up the seams on the leg extensions nicely.
- Overlock and press the seams together towards the back of the trousers. Then top stitch the seam allowances to the back legs, 0.6 cm from the seam.
- Sew the front and back leg inseams right sides together with 1.27 cm seam allowance. Press the seam allowances apart.
Waist band
- Fold the belt loop (piece 12) in half and press. Fold both raw edges in to meet, then press again.
- Top stitch the belt loop piece along both long sides 0.3 cm from the edge.
- Cut belt loop piece every 7.6 cm to get 5 pieces of equal length.
- Line up the belt loops along the waist band, then stay stitch along the whole waist band at 0.6 cm and secure the belt loops in place at the same time.
- Line up right sides together one each of left waistband (piece 10) and of right waste band (piece 11). Stitch along the short side on the curved side at 1.27 cm. Press the seams open.
- Put the resulting two long waistband pieces right sides together on top of each other. Sew along the inner curve, as well as the short sides, at 1.27 cm seam allowance.
- Clip the corners of the sewn seam allowance.
- Turn the waist band right side out and press flat.
- Waist band should sit nice and flush on the left side of the zipper opening, as well as nice and flush on the right side of the zipper opening. Match up the notches with the side seams and the back seam with the back seam.