Premise
Building inserts for the hallway cupboard to make use of the wasted space underneath the hanging shelf, and get a bit more structure.
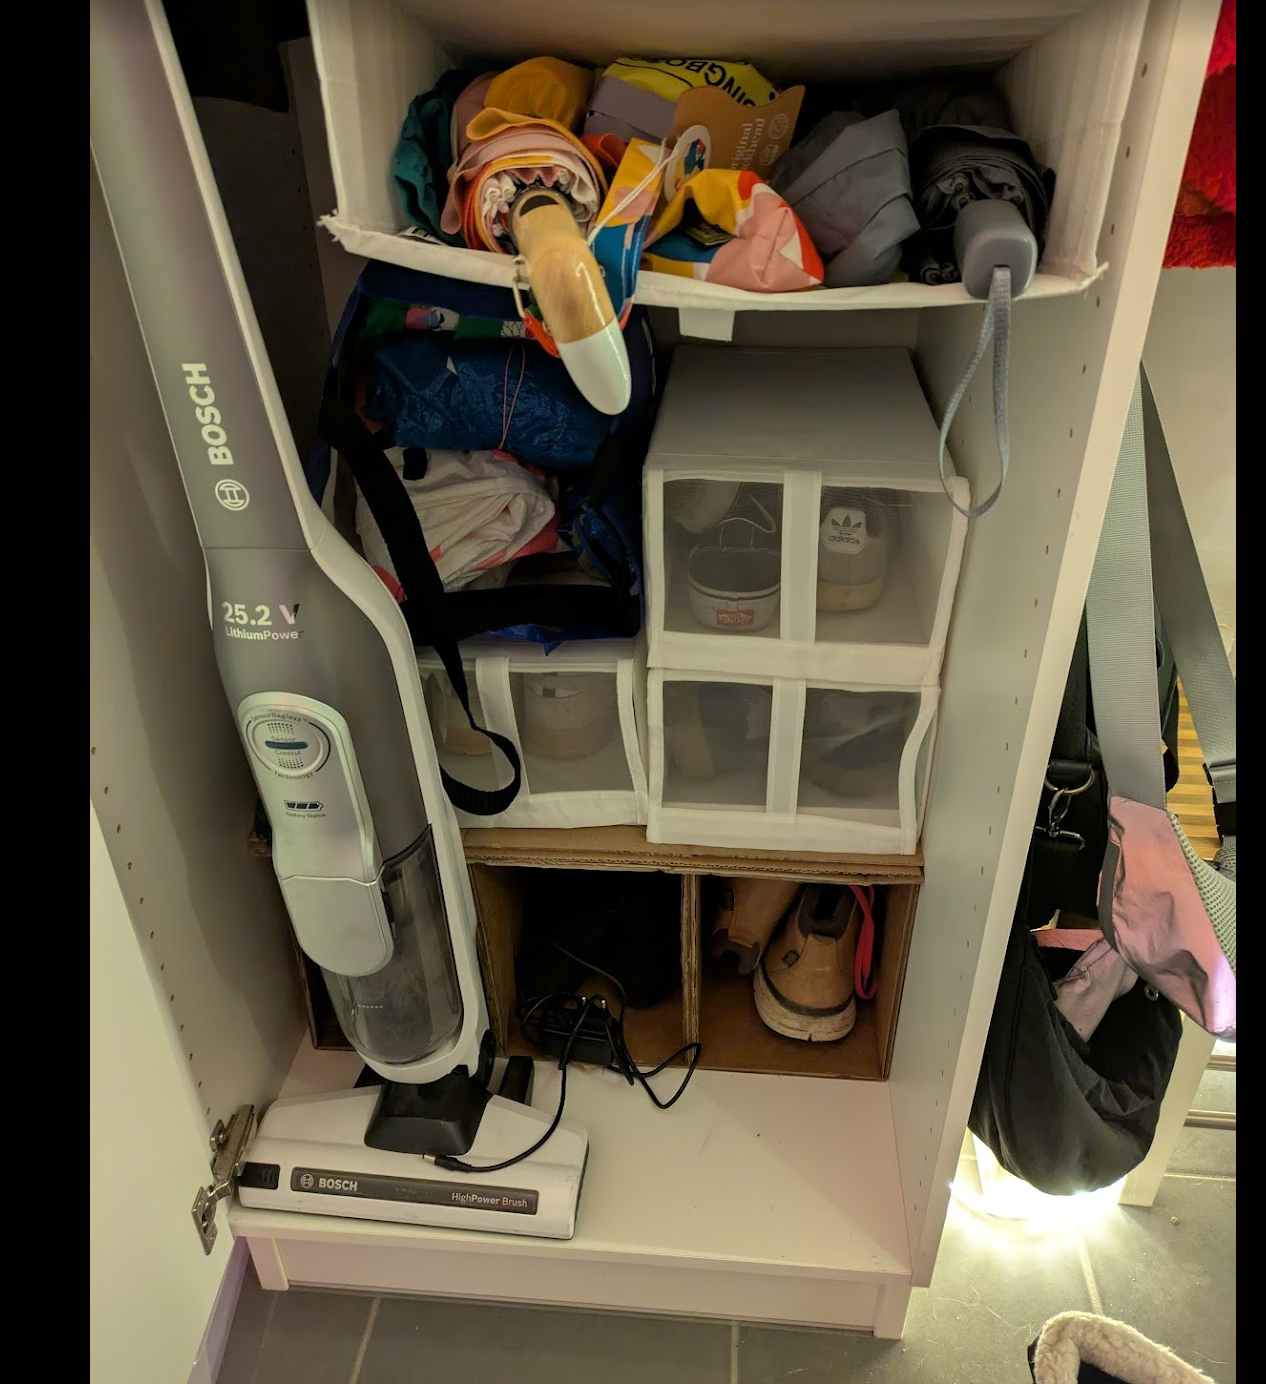
I would like to make shelf inserts for the hallway cupboard to fit in more stuff in a nice way, especially shoes. Material: cardboard - I have plenty of it and it’s sturdy enough for my purposes.
Timeline
- Sketch by hand
- Investigate cardboard techniques
- Sketch and plan in CAD
- Build with cardboard
1. Sketch by hand
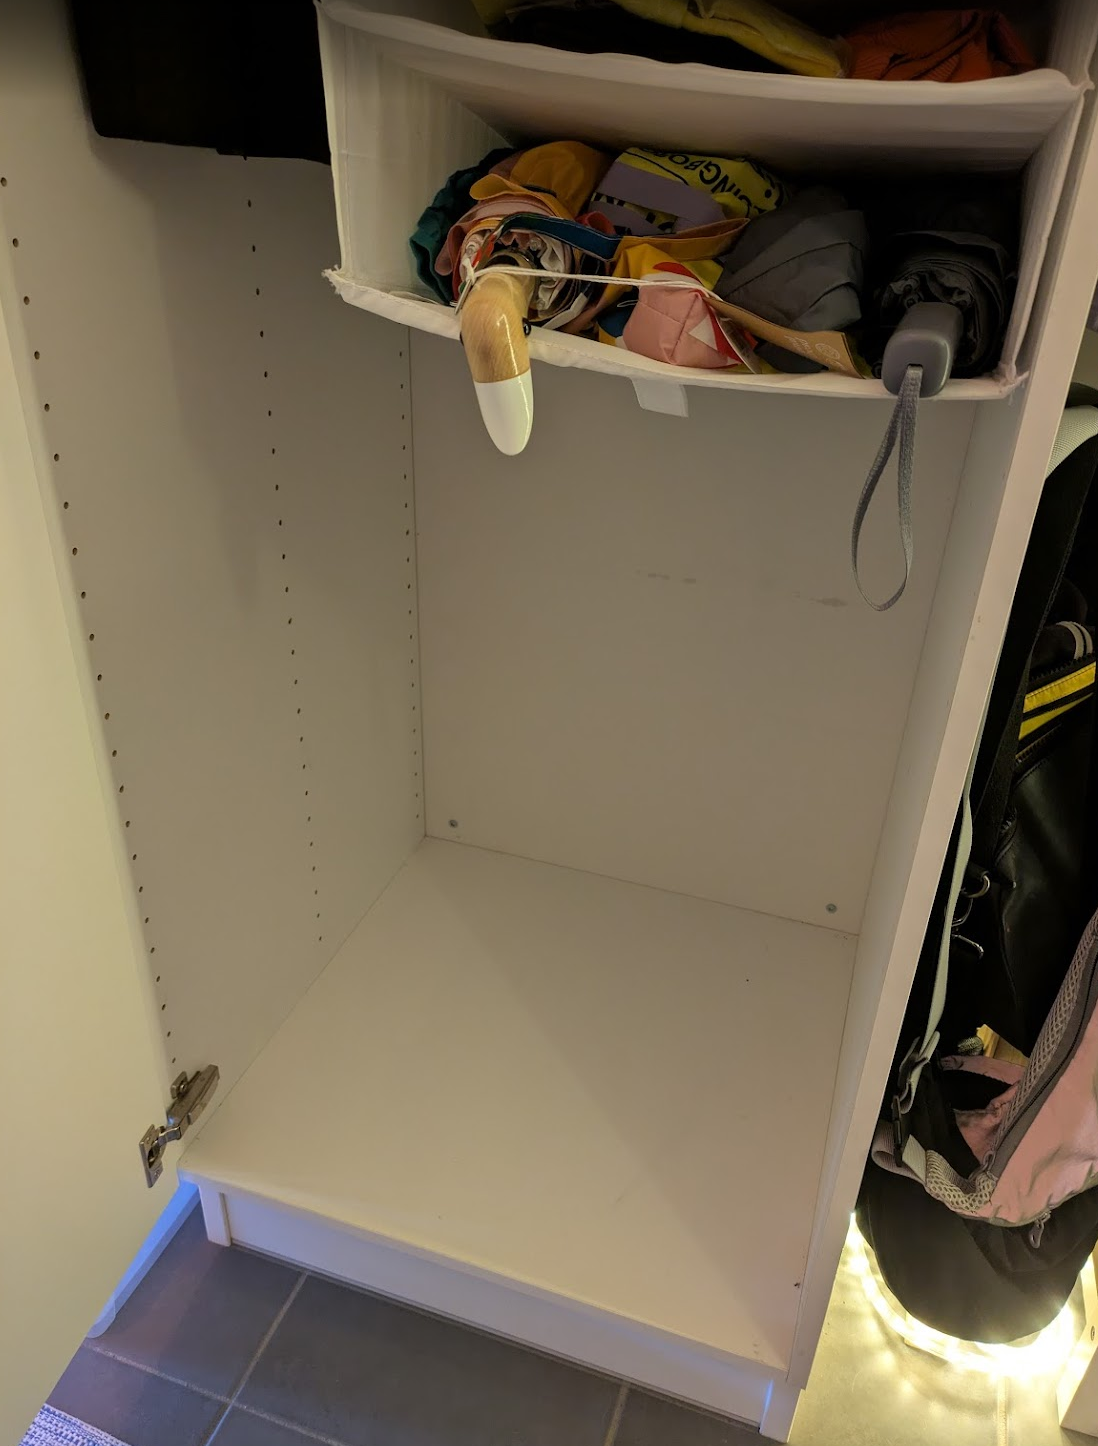
- Move bar up by at least 15 cm. ⇒ Increases height available for shelf to 71 cm.
- Height: 71-ish cm. 71 / 3 = 23.6 cm height per shoe shelf. Enough for even Duncan’s shoes.
- Width: 57 cm. 57 / 3 = 19 cm width per shoe shelf. Plenty for my and Duncan’s shoes.
- Depth: 56 cm. That is very deep and actually much too much for a shoe shelf. But maybe I can make little drawer inserts, so at least some of the full depth can be used?
2. Investigate cardboard techniques
How to connect cardboard together (perpendicular): L-brackets might be the best option for me here. Simple, but strong enough.
I can build the actual shelves in continuous boards to have the maximum strength (maybe even double up the cardboard?) and then connect and attach the vertical dividers with L-brackets.
3. Sketch and plan in CAD
Use intro steps from: Lesson 1- Designing a simple toolbox
- Bottom plate: Solid > Create > Create sketch. Draw a rectangle 570 mm x 560 mm.
- Finish sketch.
- Extrude the rectangle upwards by 3 mm.
- Side plate 1: Create sketch > From bottom plate plane. Draw rectangle 710 mm x 560 mm. Extrude with 3 mm thickness.
- Side plate 2: To copy Side plate 1 to the other side, select Move/Copy on it. In the new dialog box, make sure to select Move Object: Bodies, then click on the side panel to select it. Select Move Type: Point to point. Check the box Create copy. Then first click on an Origin point, e.g. the outer top corner of the side panel. Then click on a Target point, e.g. the outer top corner of where the second side panel should go.
- …
In the end I abandoned the CAD planning, since the project was simple enough to just do it by measuring and adjusting. It was not worth spending the time in CAD.
4. Build with cardboard
2025-11-16
After finding good cardboard material in the trash room, I measured the available space and divided it into useful sections. 3 sections for holding shoes, and a sturdy, reinforced top plate to hold things that are put on top of it.
Scoring the cardboard to make L-bracket.

Making starch glue to glue boards together.
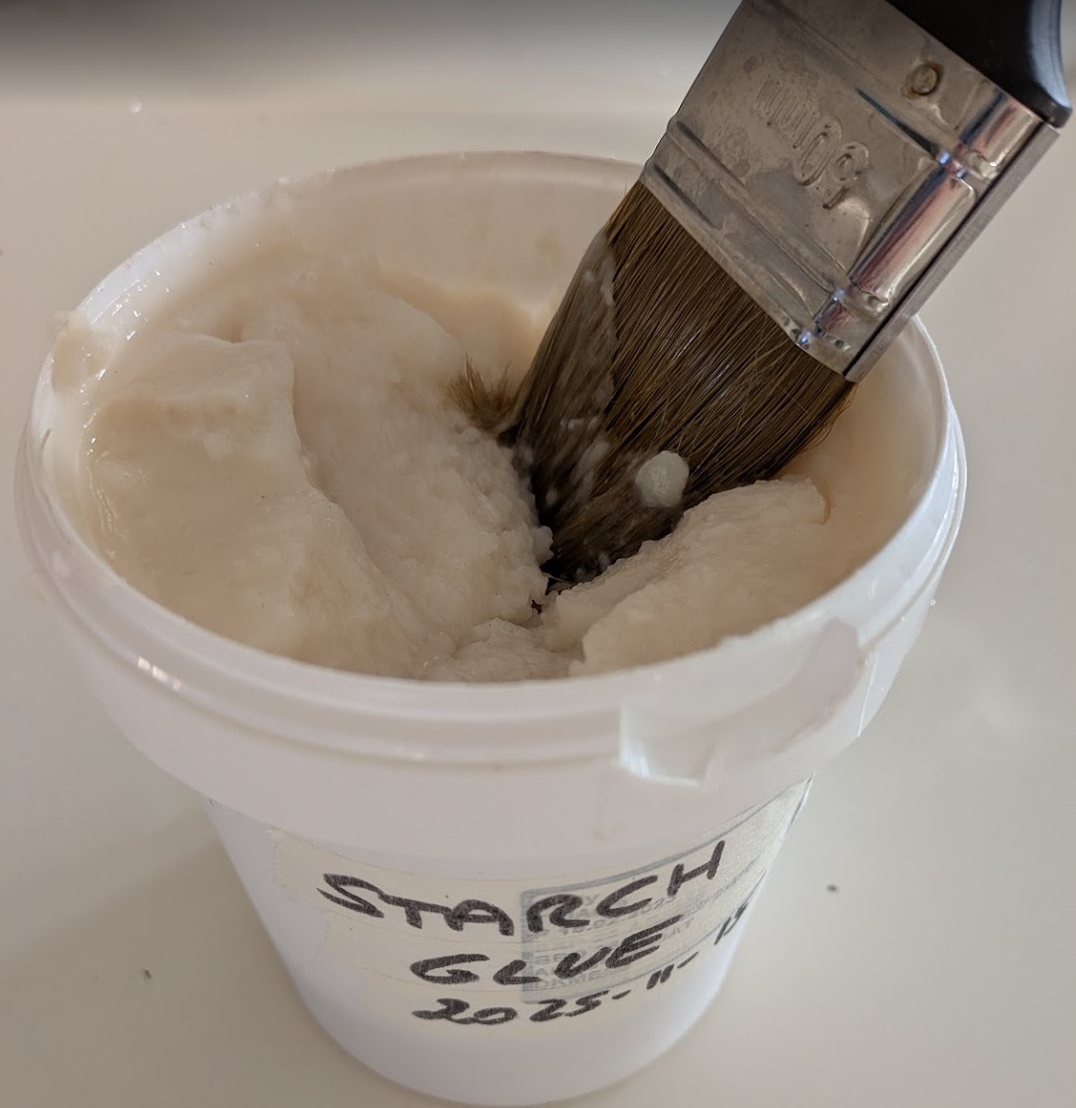
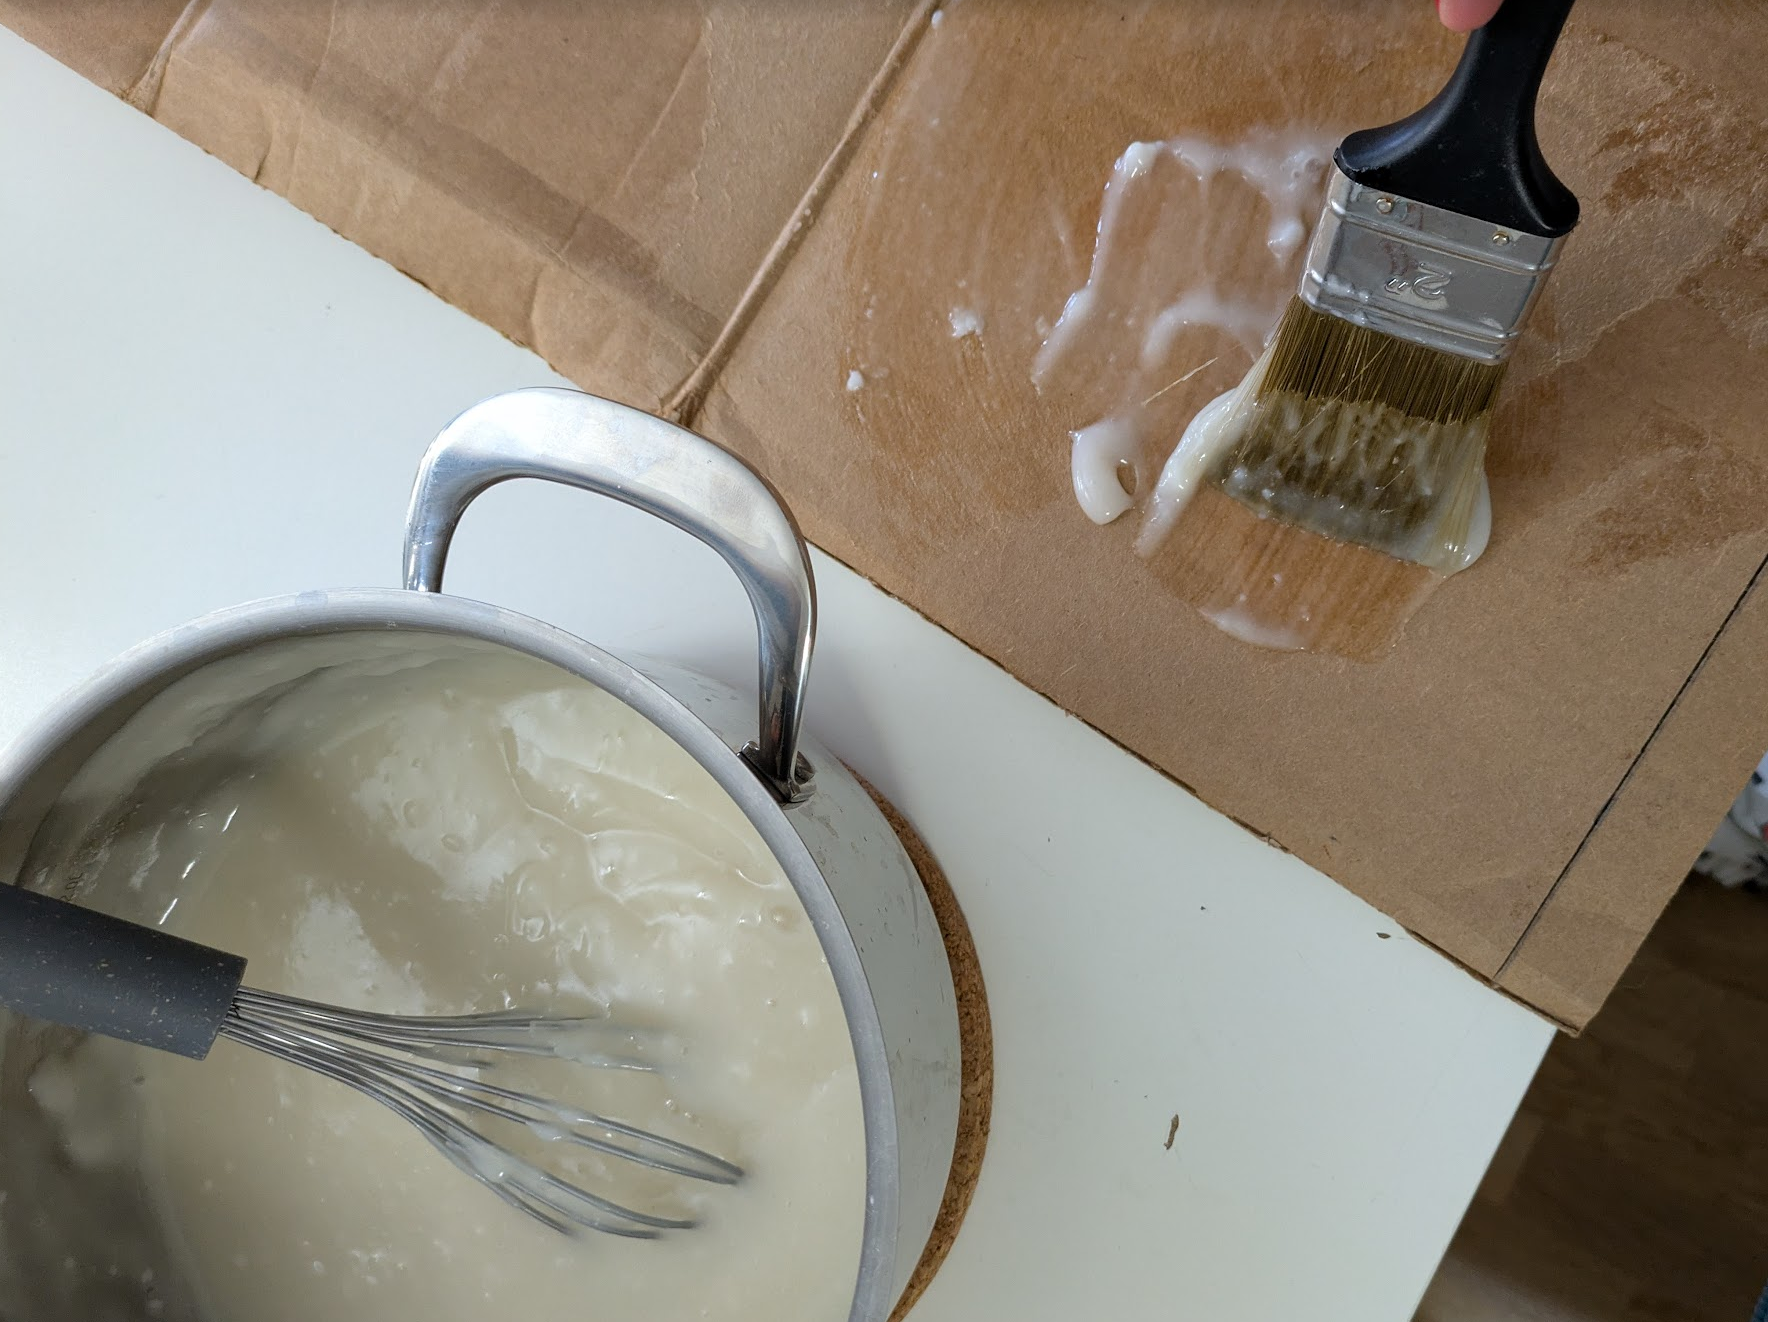
The boards that were glued together were held in place by clamps for 24h. The glue can be kept in the fridge for at least 2 months.
2025-12-25
Fitting in the 3 separate cardboard sections that will be glued together, and then adjusted.
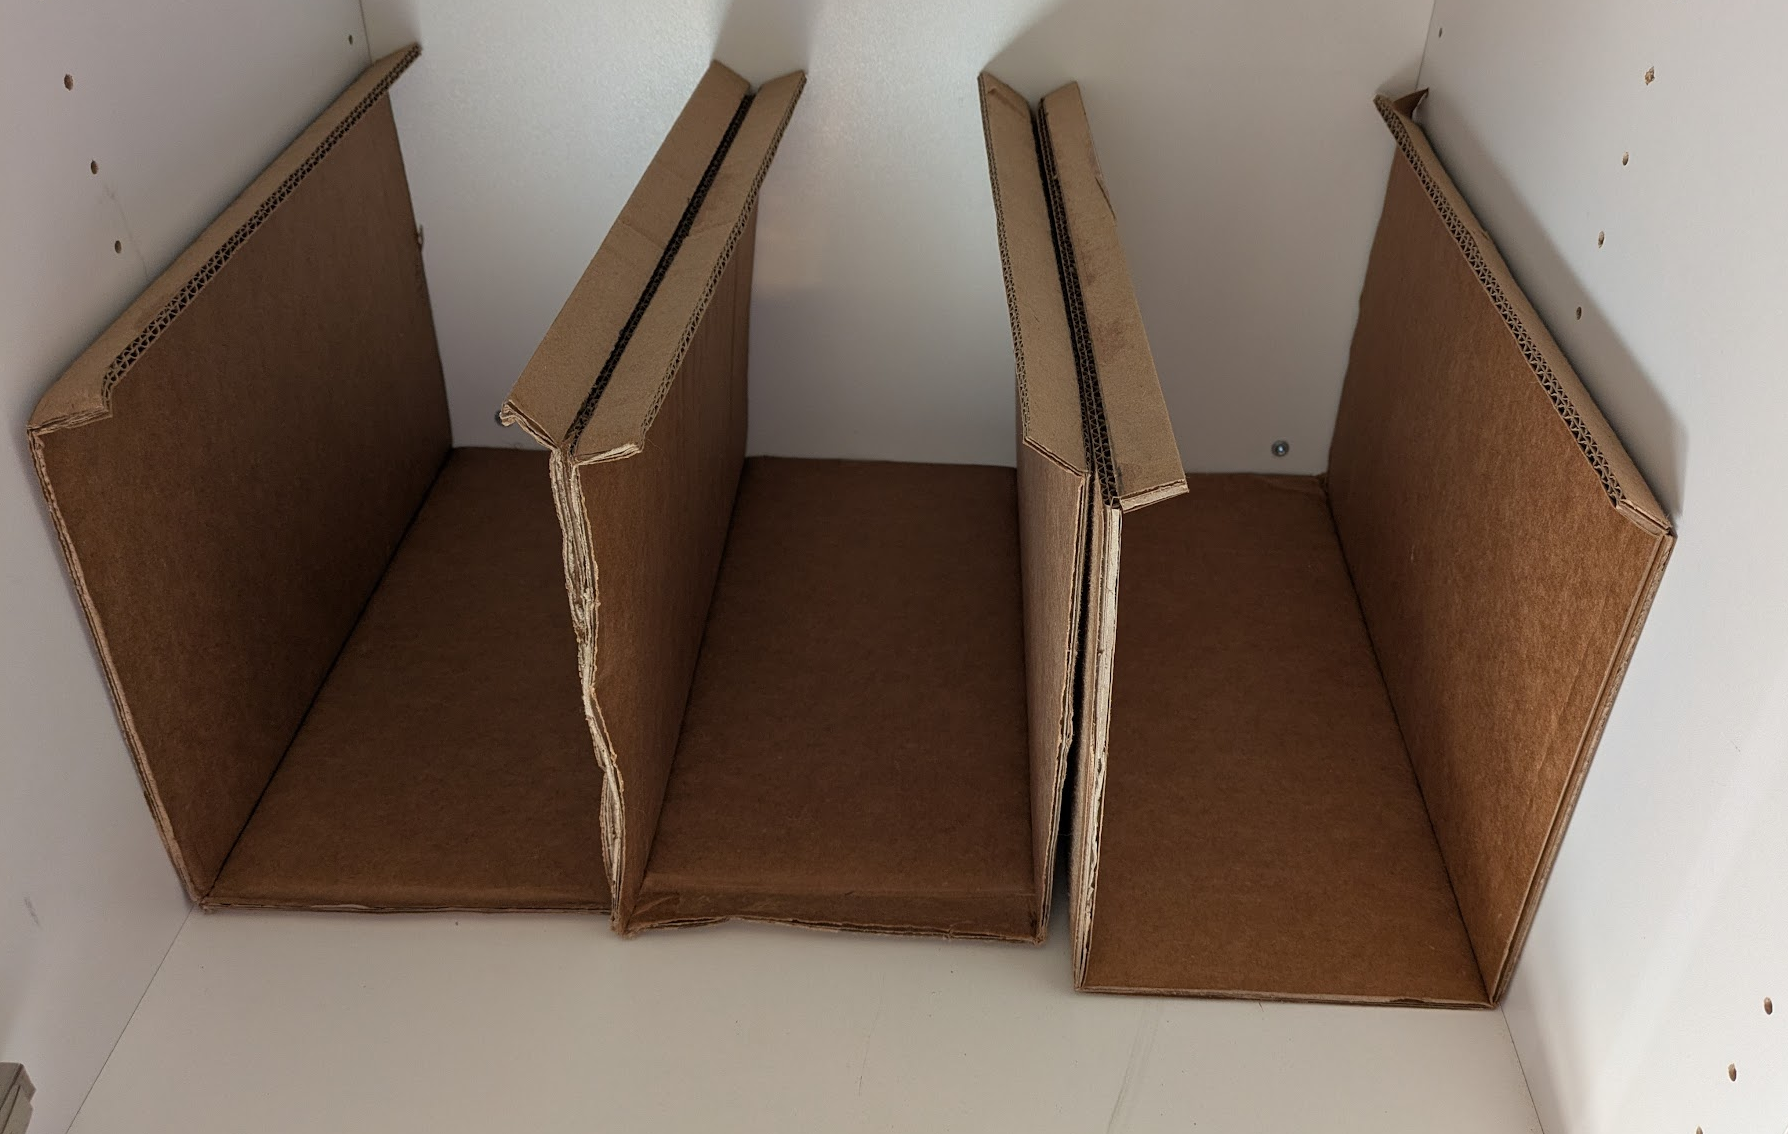
The most important thing here was that the L-parts of the cardboard sections, where the top plate would rest on, are of the same height and the top plate would be nicely horizontal and not warped.
Top plate installed.
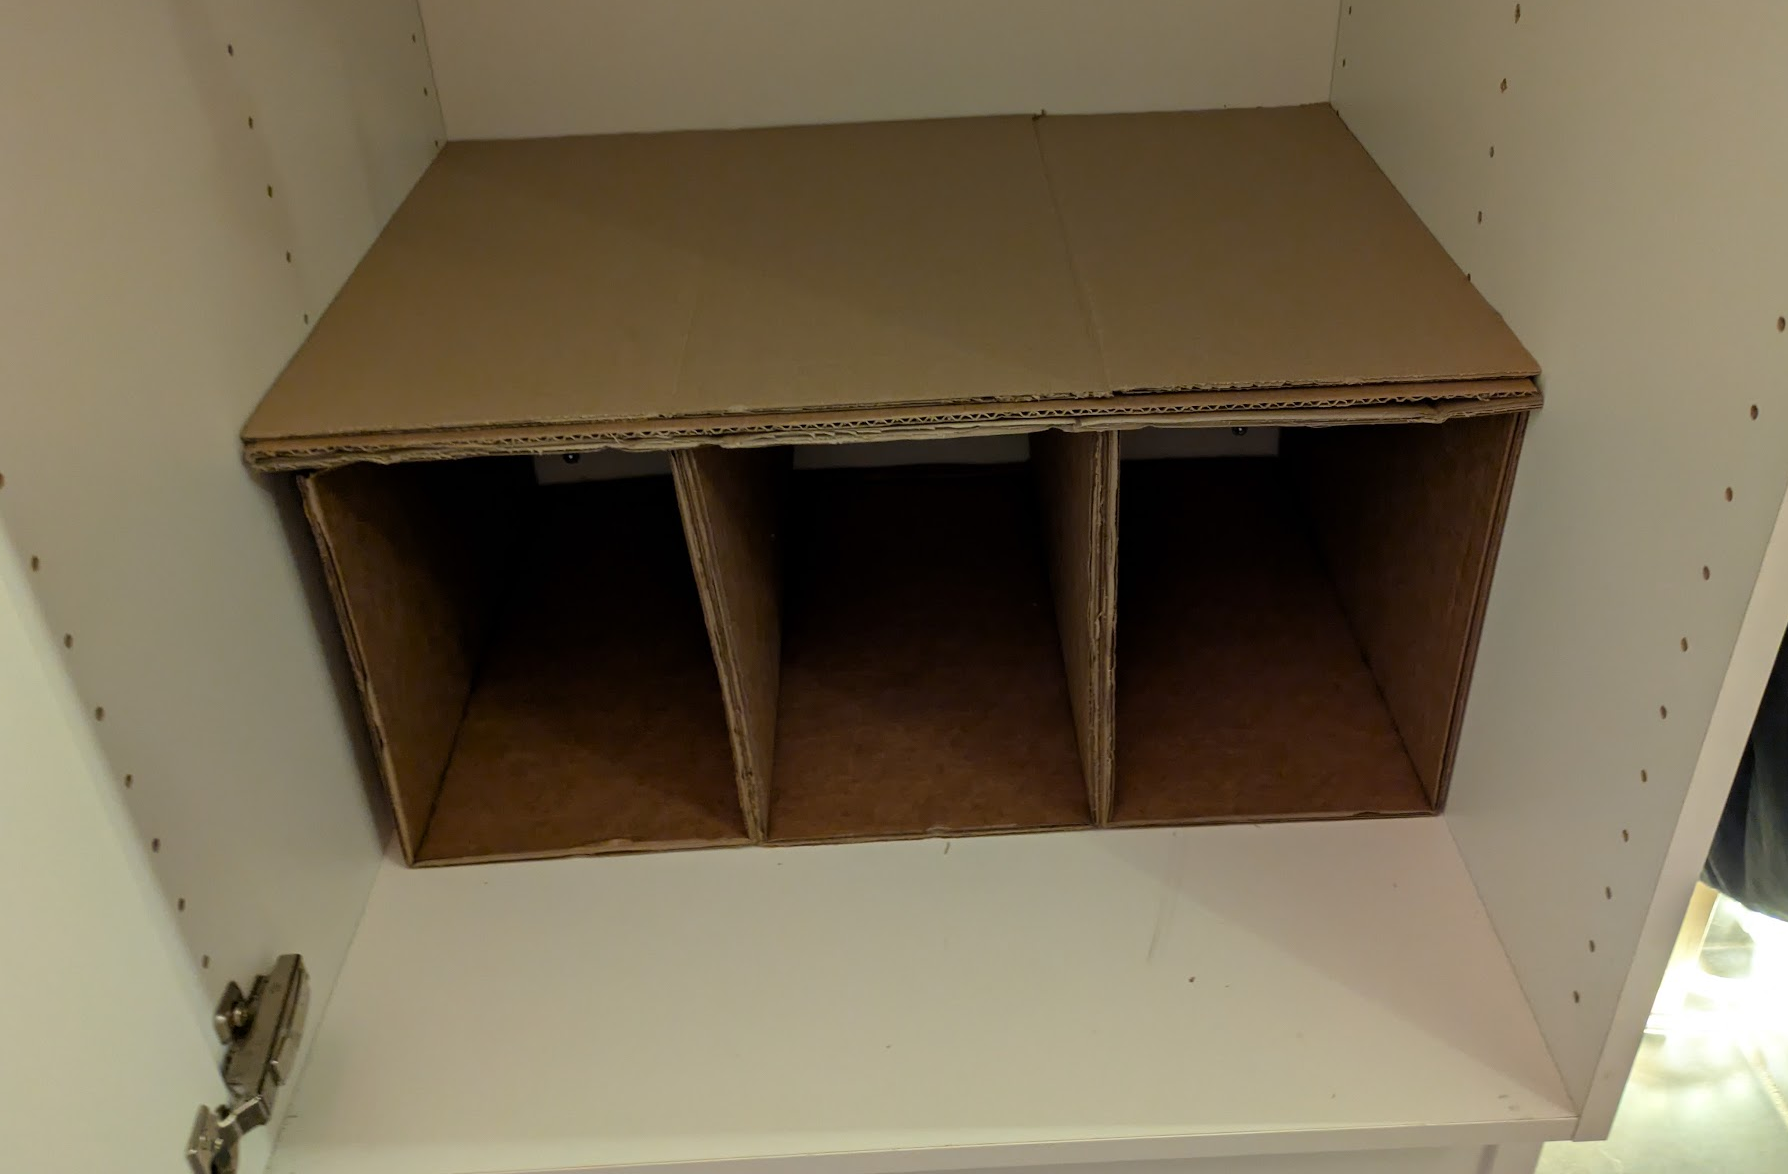
In the example above the top plate was still a bit too wide (see a gap on the left side), so had to be adjusted a bit. I used three separate cardboard plates that were cut to the same size. The middle one was a perpendicular angle to the other two, i.e. the grains were going in the perpendicular direction. This gives the whole construction much more strength. Top plates were glued together with starch glue and left under weight for 24h.
The final cardboard insert with all kinds of other stuff piled on top.