https://www.youtube.com/watch?v=Izh99EnGLGw
Lesson 1 - designing a simple toolbox
Sketch = foundation of anything you want to draw or design. Allows to set a plane that can be modified and adjusted.
Solid > Create > Create Sketch. Select the right plane for your sketch and click on it to enter the 2D view of that plane.
E.g. for a line, select Sketch > Line, or shortcut type “l” for the line tool. Click to start the line and either drag out or write the value into the highlighted text box. When typing a value, click tab to switch to being able to type in the angle for the line.
- Create a rectangle by drawing four lines in the right angles to each other.
When moving the cursor along the outline of the rectangle, it turns into different actions. Triangle = indicates midpoint of the object.
- Put a triangle shape on top of the rectangle.
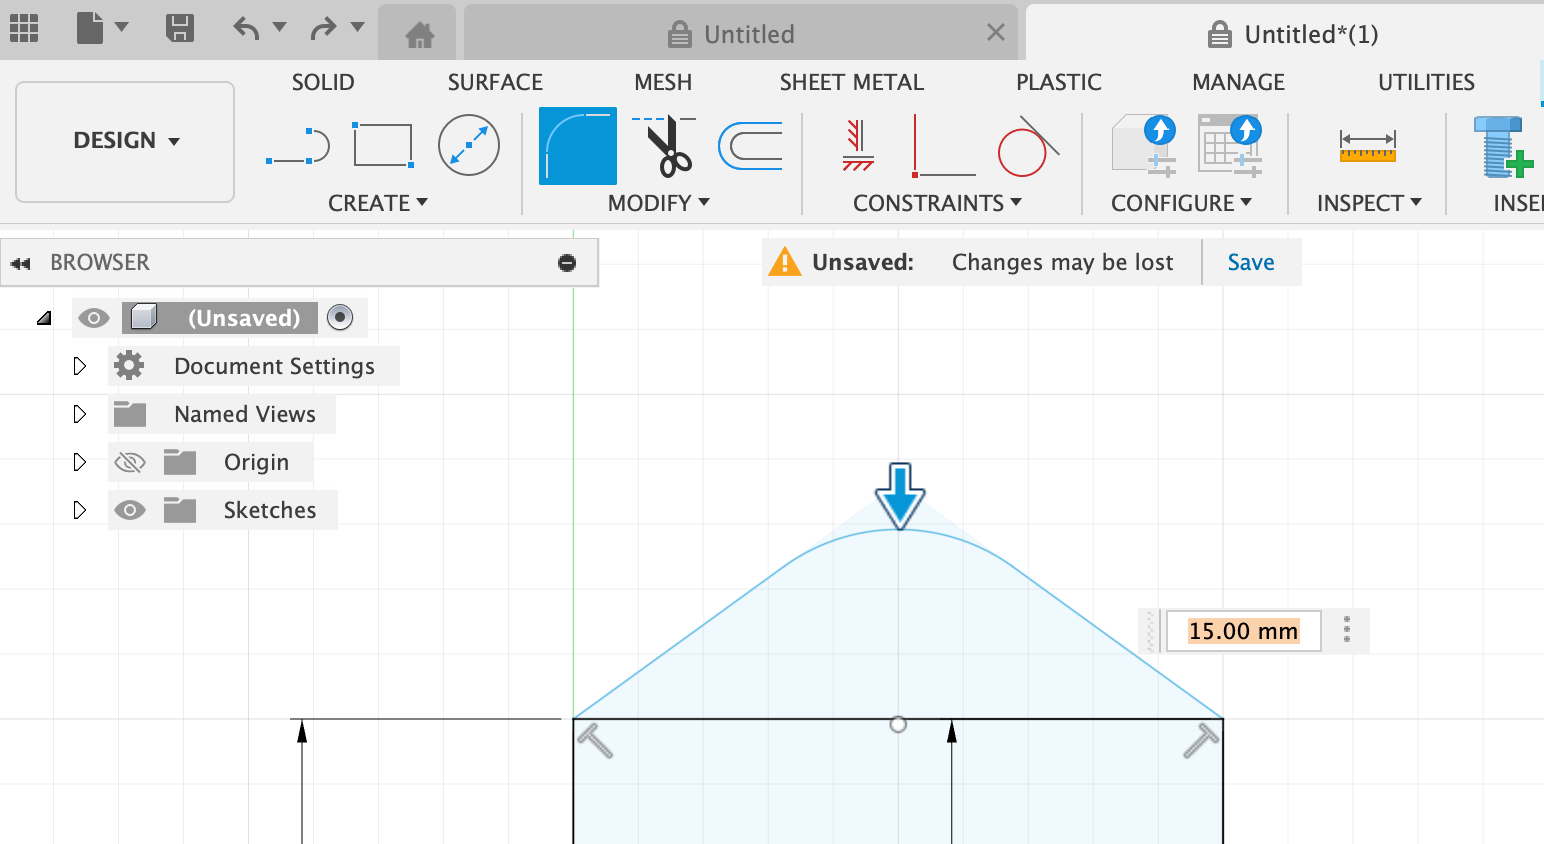
- Add a fillet. Fillet = places an arc of a specified radius at the intersection of two lines or arcs. Select Fillet, click one line, then an adjacent line to create the fillet (rounded corner). Then pull on the arrow above the fillet up or down (or type in a value) to define the radius of the fillet.
-
Add a circle for a cutout. Select the Circle tool and make a center diameter circle in the triangle portion of the sketch with a defined diameter.
-
Finish the sketch and go into 3D mode. Click on Finish Sketch. Now the 2D sketch surface can be seen in 3D when moving the mouse around (with Shift), selecting the Orbit tool on the bottom of the screen, or click and drag on the box icon in the upper right corner.
-
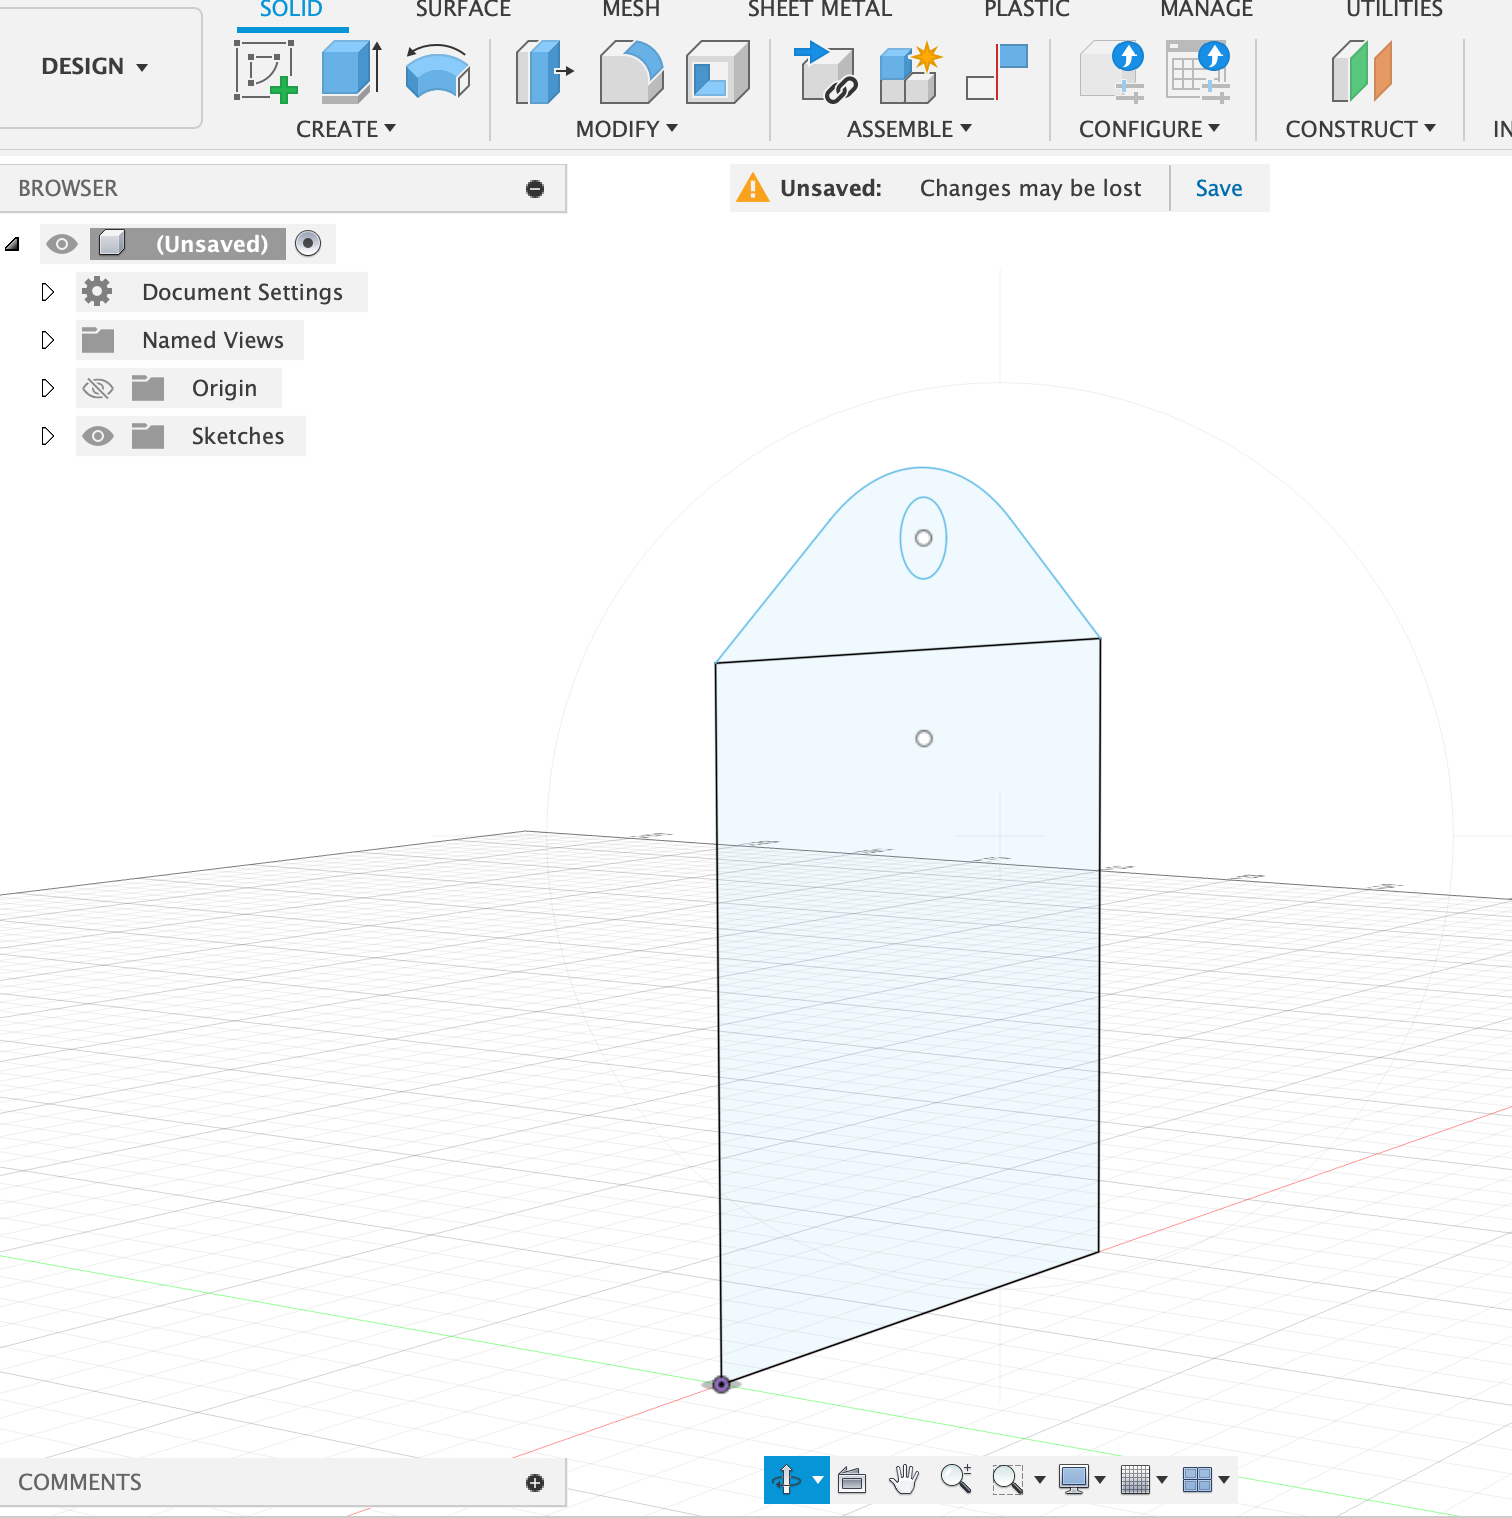
Extrude the sketch. To make a 3D object out of the 2D sketch, i.e. to give it depth or thickness, select the Extrude function in the menu Solid. Click on all the surfaces you want to extrude. Make sure to include both parts, the rectangle part and the triangle part of our sketch. In the little dialog box to the right it should say “Profiles: 2 selected”. Then drag on the little error that appeared or type in a value for the wall thickness.
-
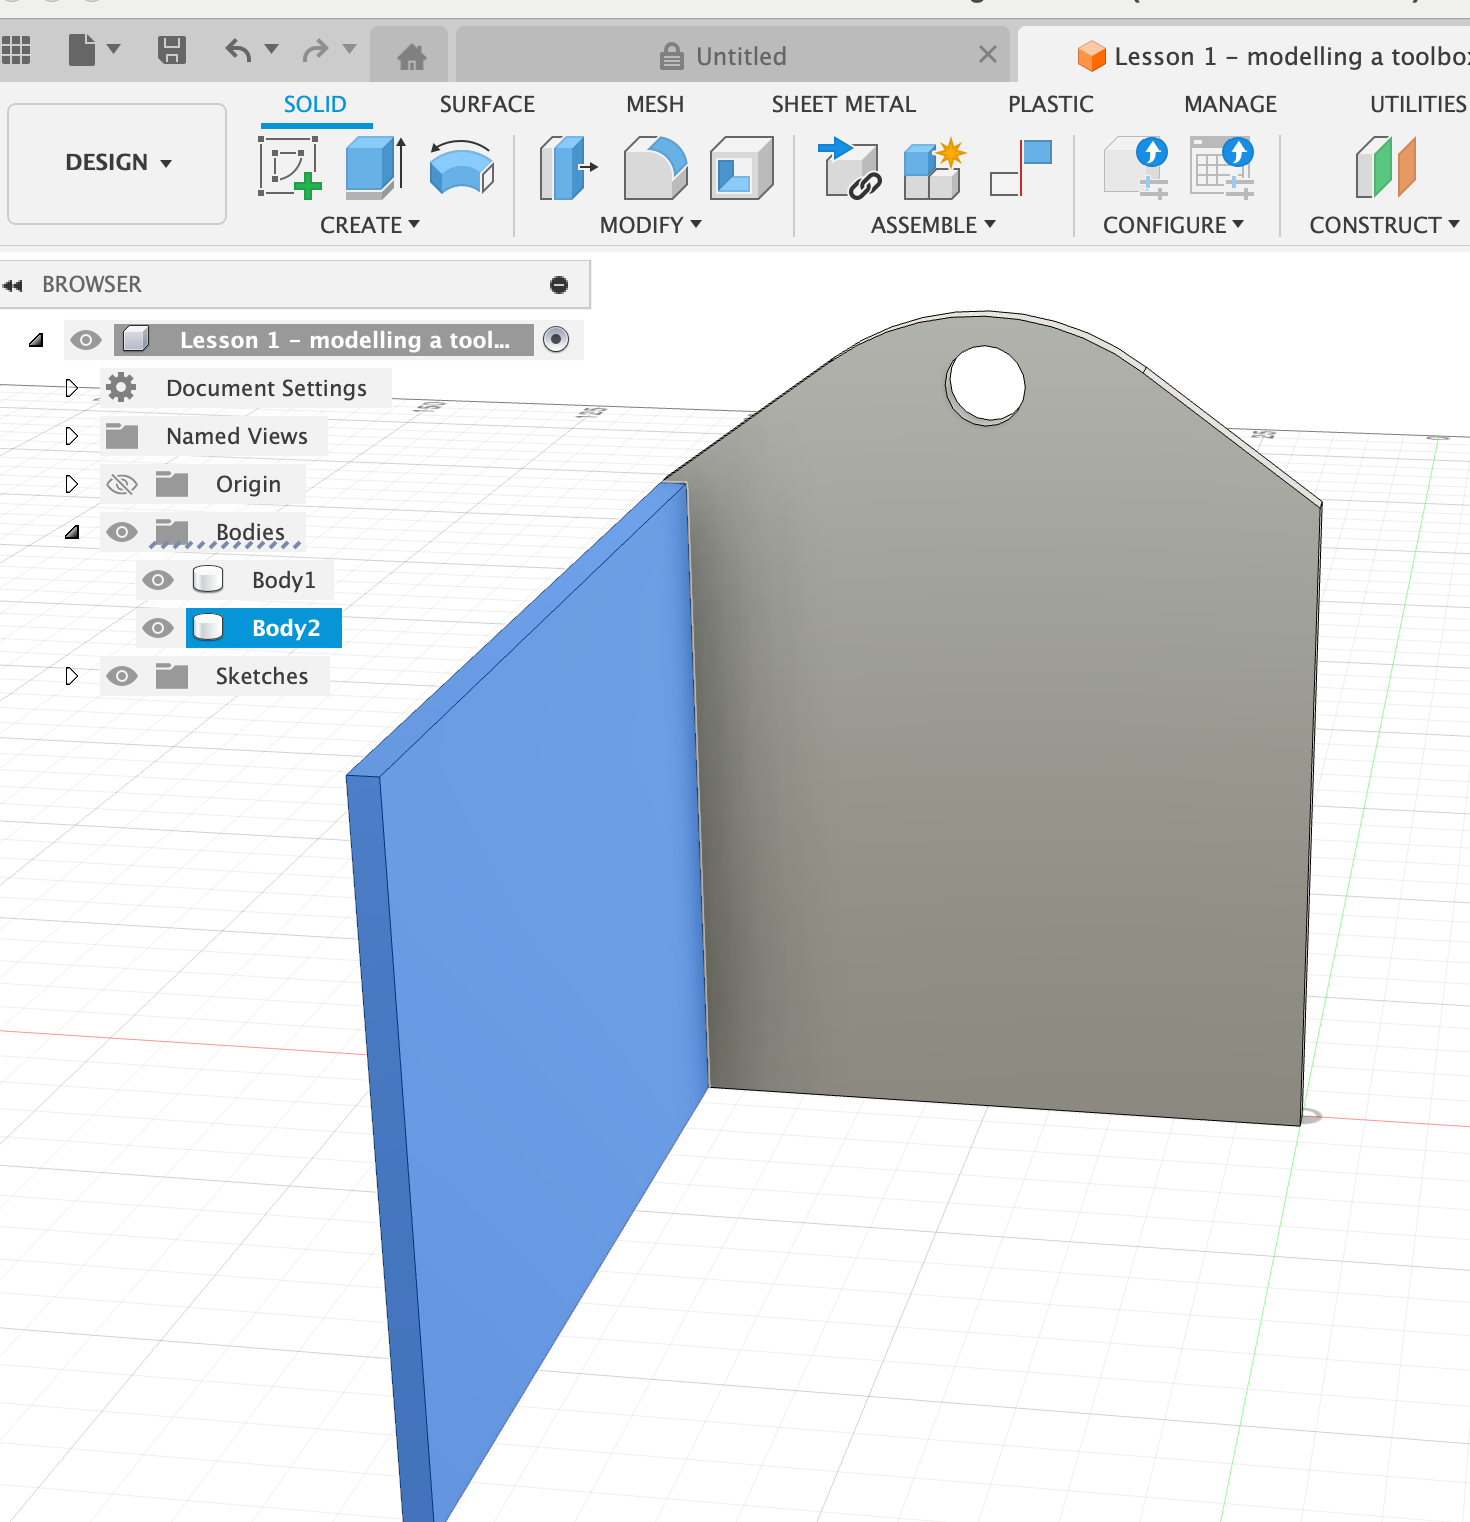
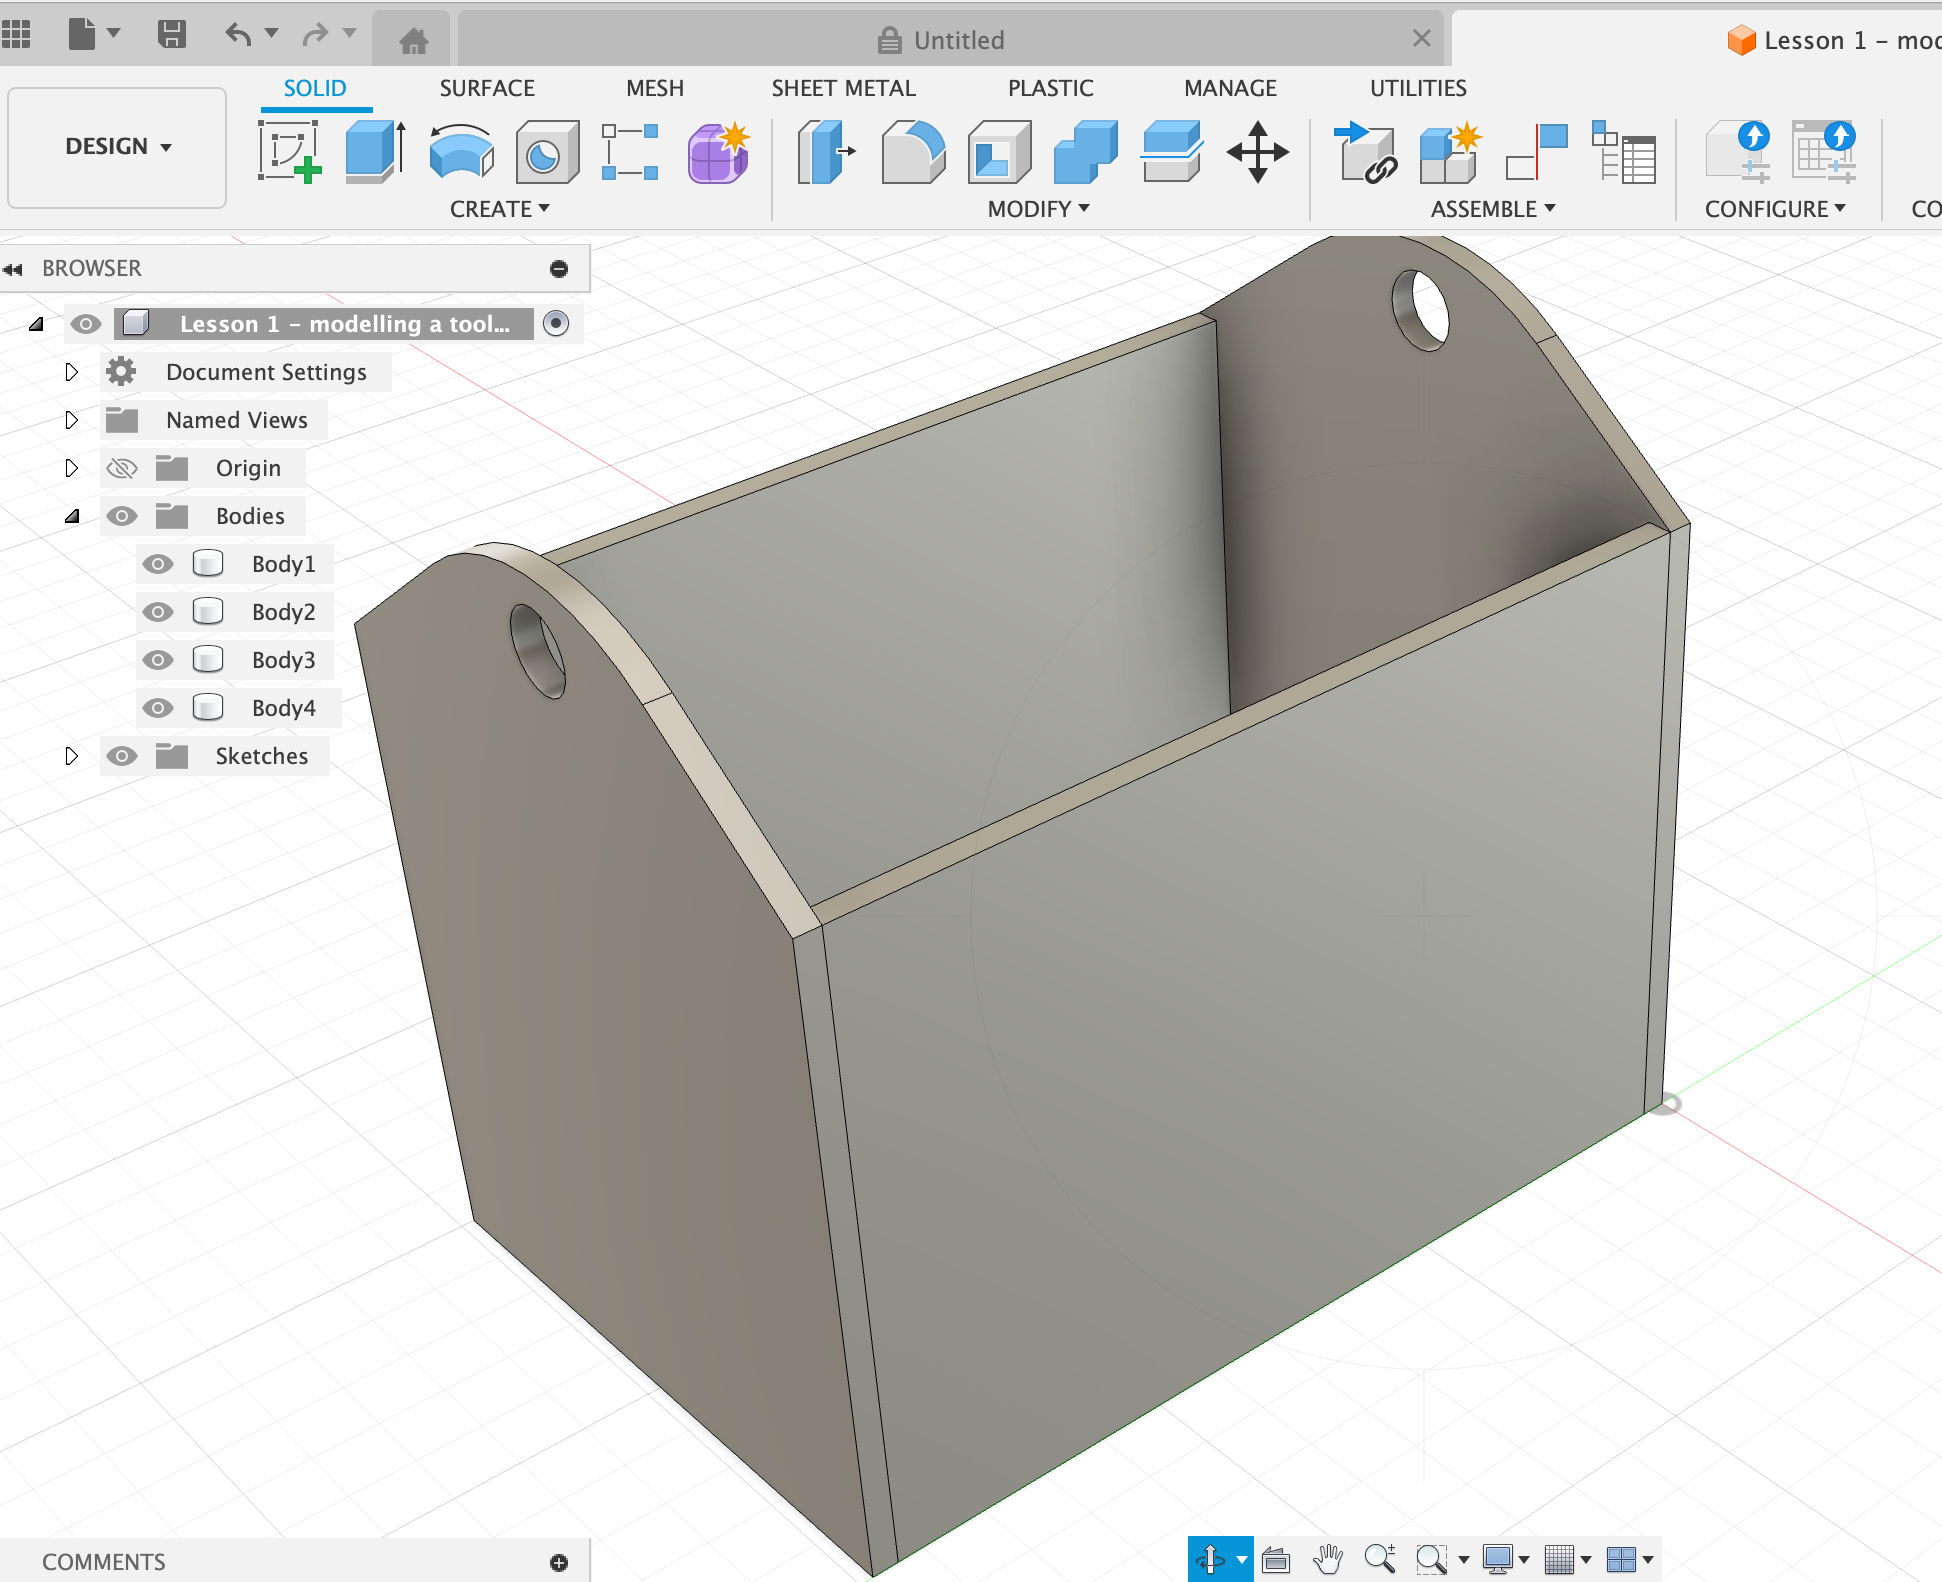
Make the sides of the toolbox. Click on Sketch, then select a face of the created 3D object, e.g. the face of the inside wall. This creates a sketch on this face. Draw a thin rectangle (width = thickness of your material, e.g. 2 mm) on the side of the toolbox. Then click Finish sketch. Select Extrude, select the right plane to extrude, then extrude forward by typing in a specific value for the length of that panel. Make sure to select New body in the Extrude dialog box, instead of Join, to not fuse the new panel to the existing one but instead make it its own object. Both of those objects, or bodies, will now also show up in the left-hand browser panel and can be renamed, as well as selected or hidden separately.
- Copy an object To copy the side panel to the other side, select Move/Copy on the top panel. In the new dialog box, make sure to select Move Object: Bodies, then click on the side panel to select it. Select Move Type: Point to point. Check the box Create copy. Then first click on an Origin point, e.g. the outer top corner of the side panel. Then click on a Target point, e.g. the outer top corner of where the second side panel should go.
Do the same for the ends of the toolbox to finish the outsides of the box.
-
Make a bottom plane for the toolbox. Select Sketch, then rotate the box to select the bottom plane by clicking on a bottom surface of one of the existing panels. Make a rectangle that covers the whole box. Extrude the bottom plane rectangle with the same thickness that the other panels have (2 mm). Make sure that the extruded bottom plate includes all the pieces that it should (e.g. the bottom plate should also cover the bottom surfaces of the side panels). If anything is not included, just click on it to select it. Make sure to select Operation: New body in the Extrude dialog box, not join, to create a separate body for the bottom panel.
-
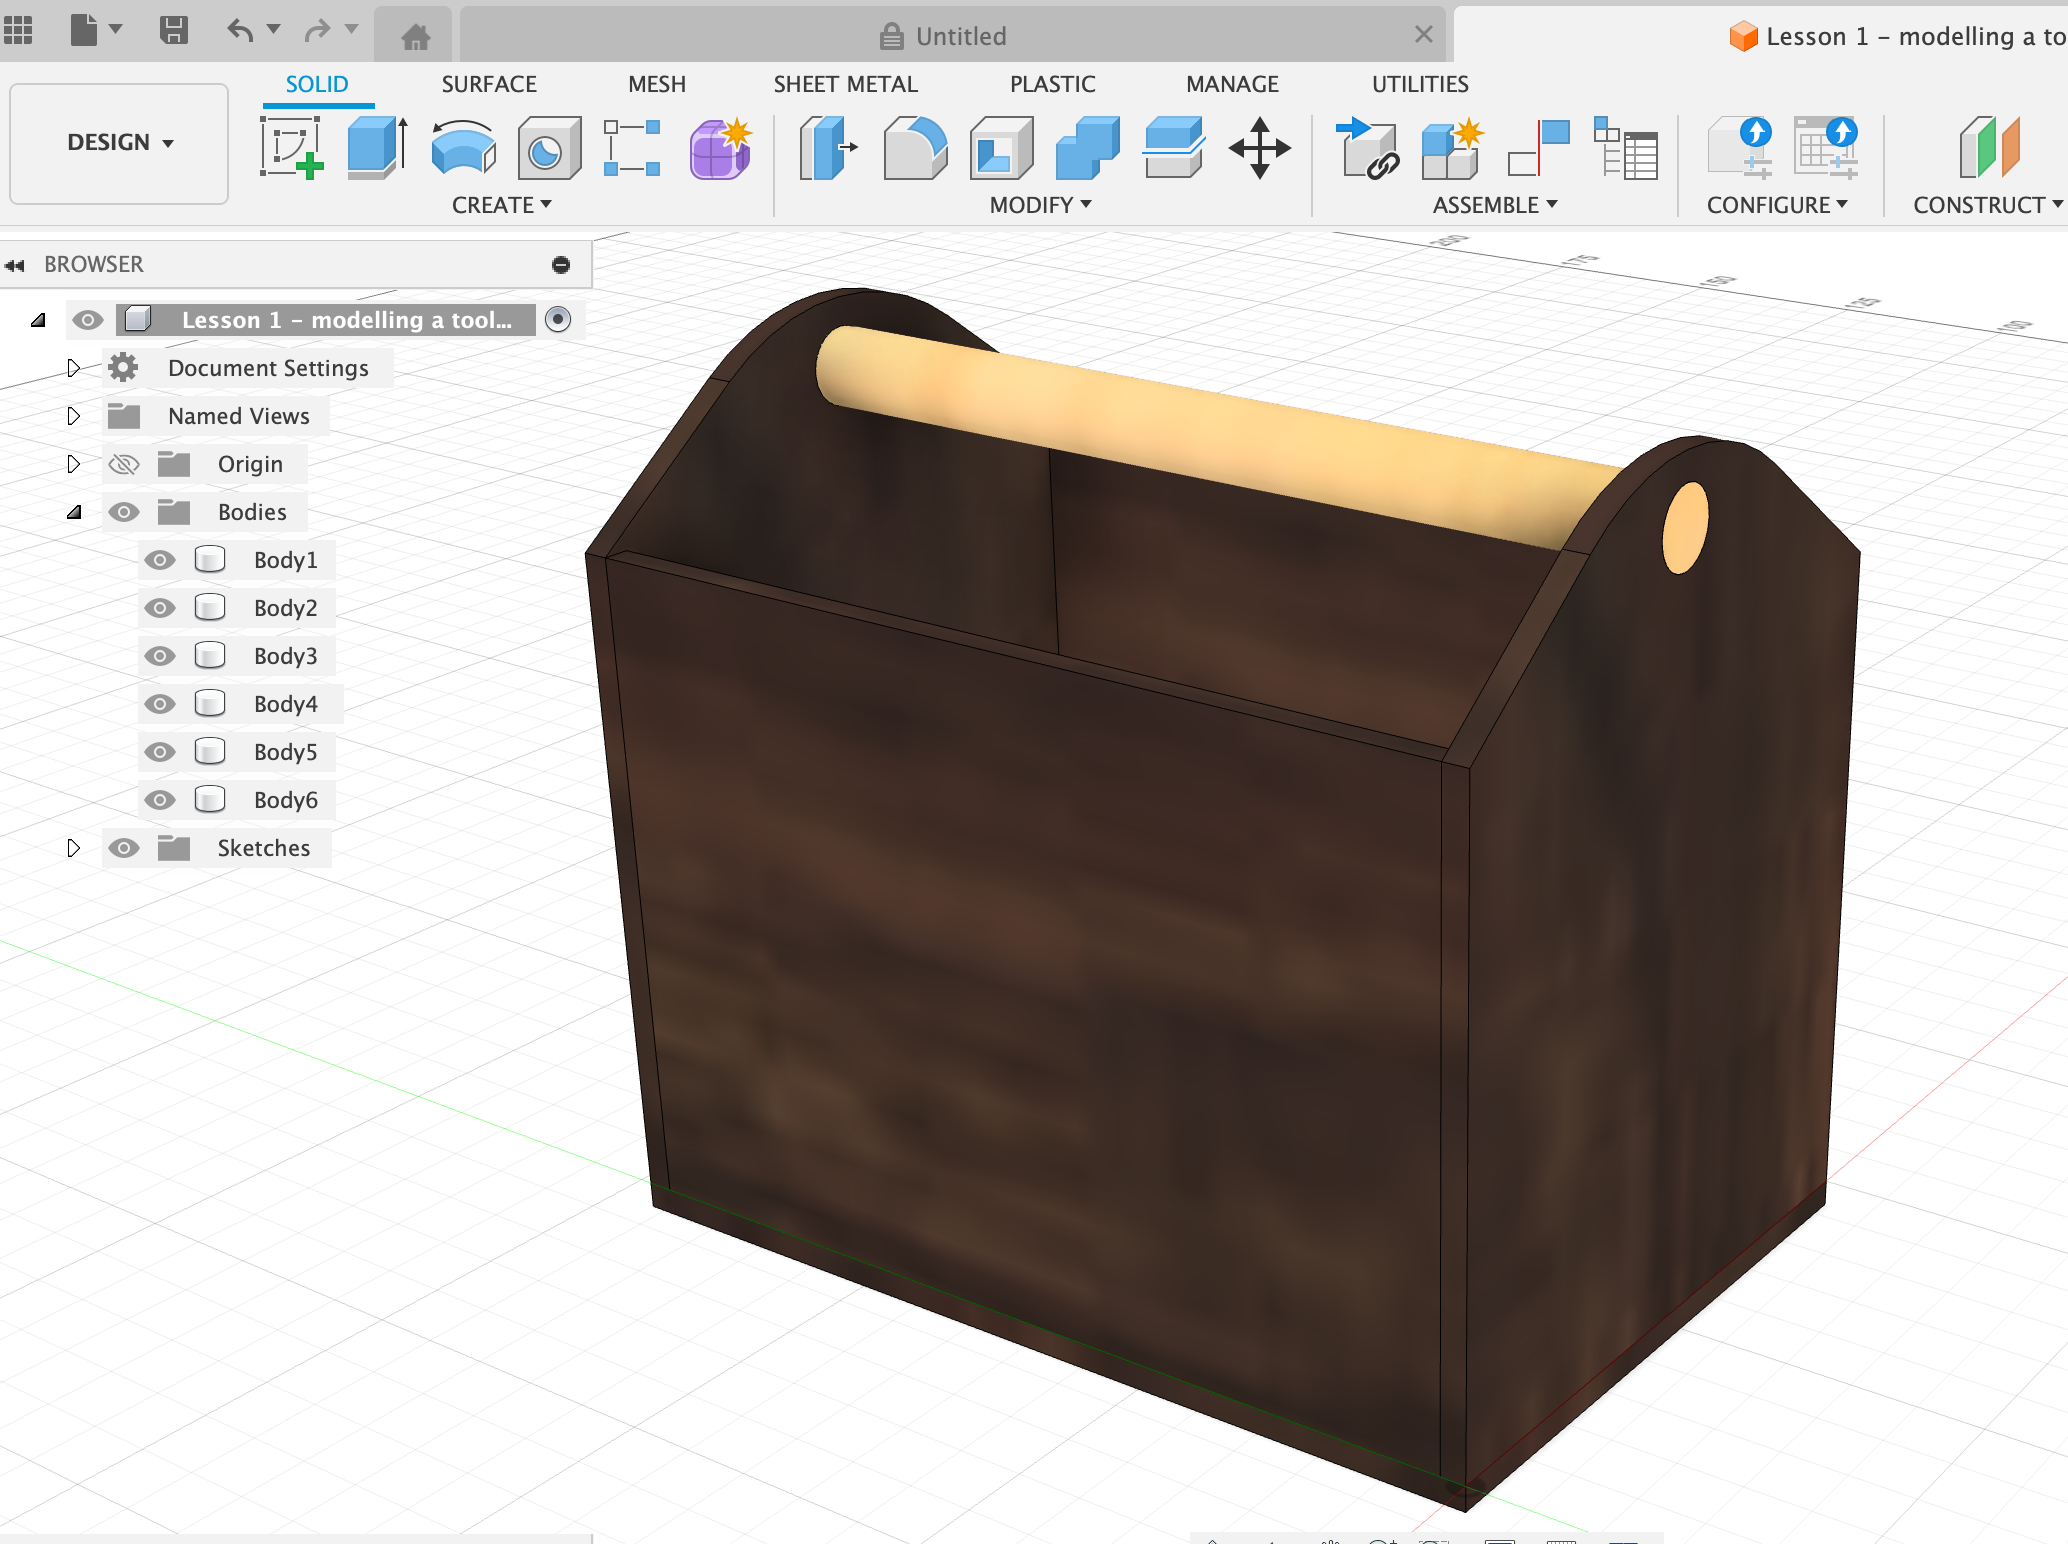
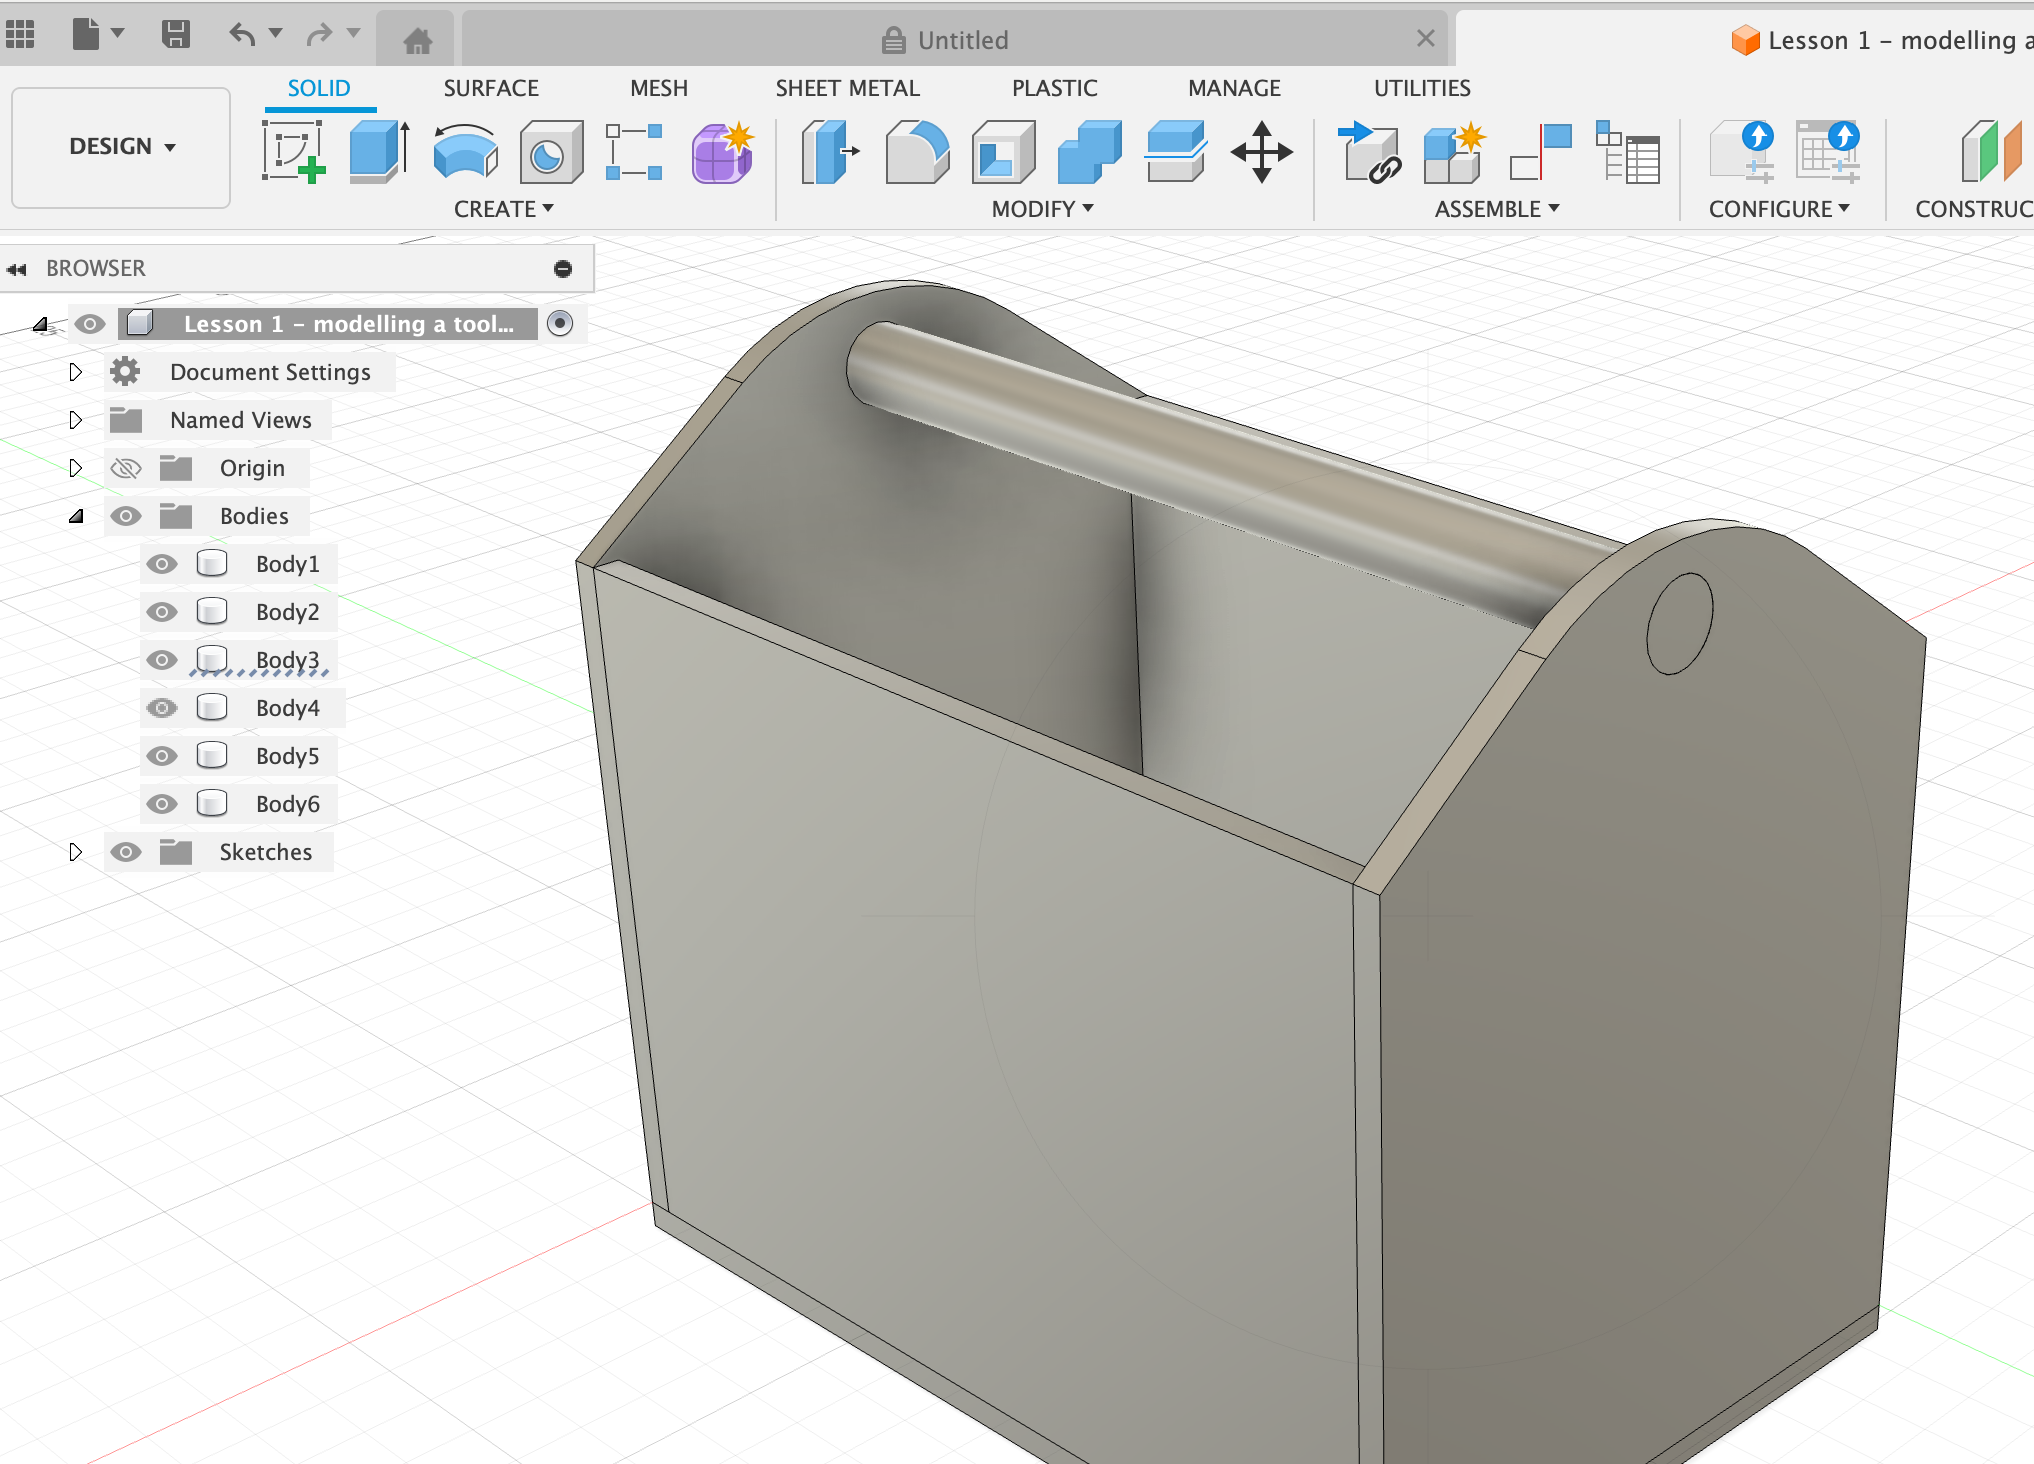
Make a dowel as a handle. On one of the end panels, sketch a circle over the hole. Then extrude it along the whole length of the toolbox to the other hole. Make sure to include any offsets if needed so that the dowel actually sticks all the way through the whole. In the Extrude dialog box, select Offset: -2 mm. Make sure the extent of the extruded dowel includes the width of the panels so that it’s flush on all sides (i.e. make it 74 mm long, if the box is 70 mm inside length, and the wall thickness is 2 mm on each side). Make sure it’s set to New Body.
- Apply a material Right-click on any sides of the object, select Appearance. Select a material, e.g. Walnut wood, and then drag the material onto each object you want. Or if the whole object should be the same material, select the whole thing by draggin the mouse over, right-click, Appearance, select a material and drag it onto the object.