Creating a bookshelf
https://www.youtube.com/watch?v=Vsod3kTlXOI&t=4s
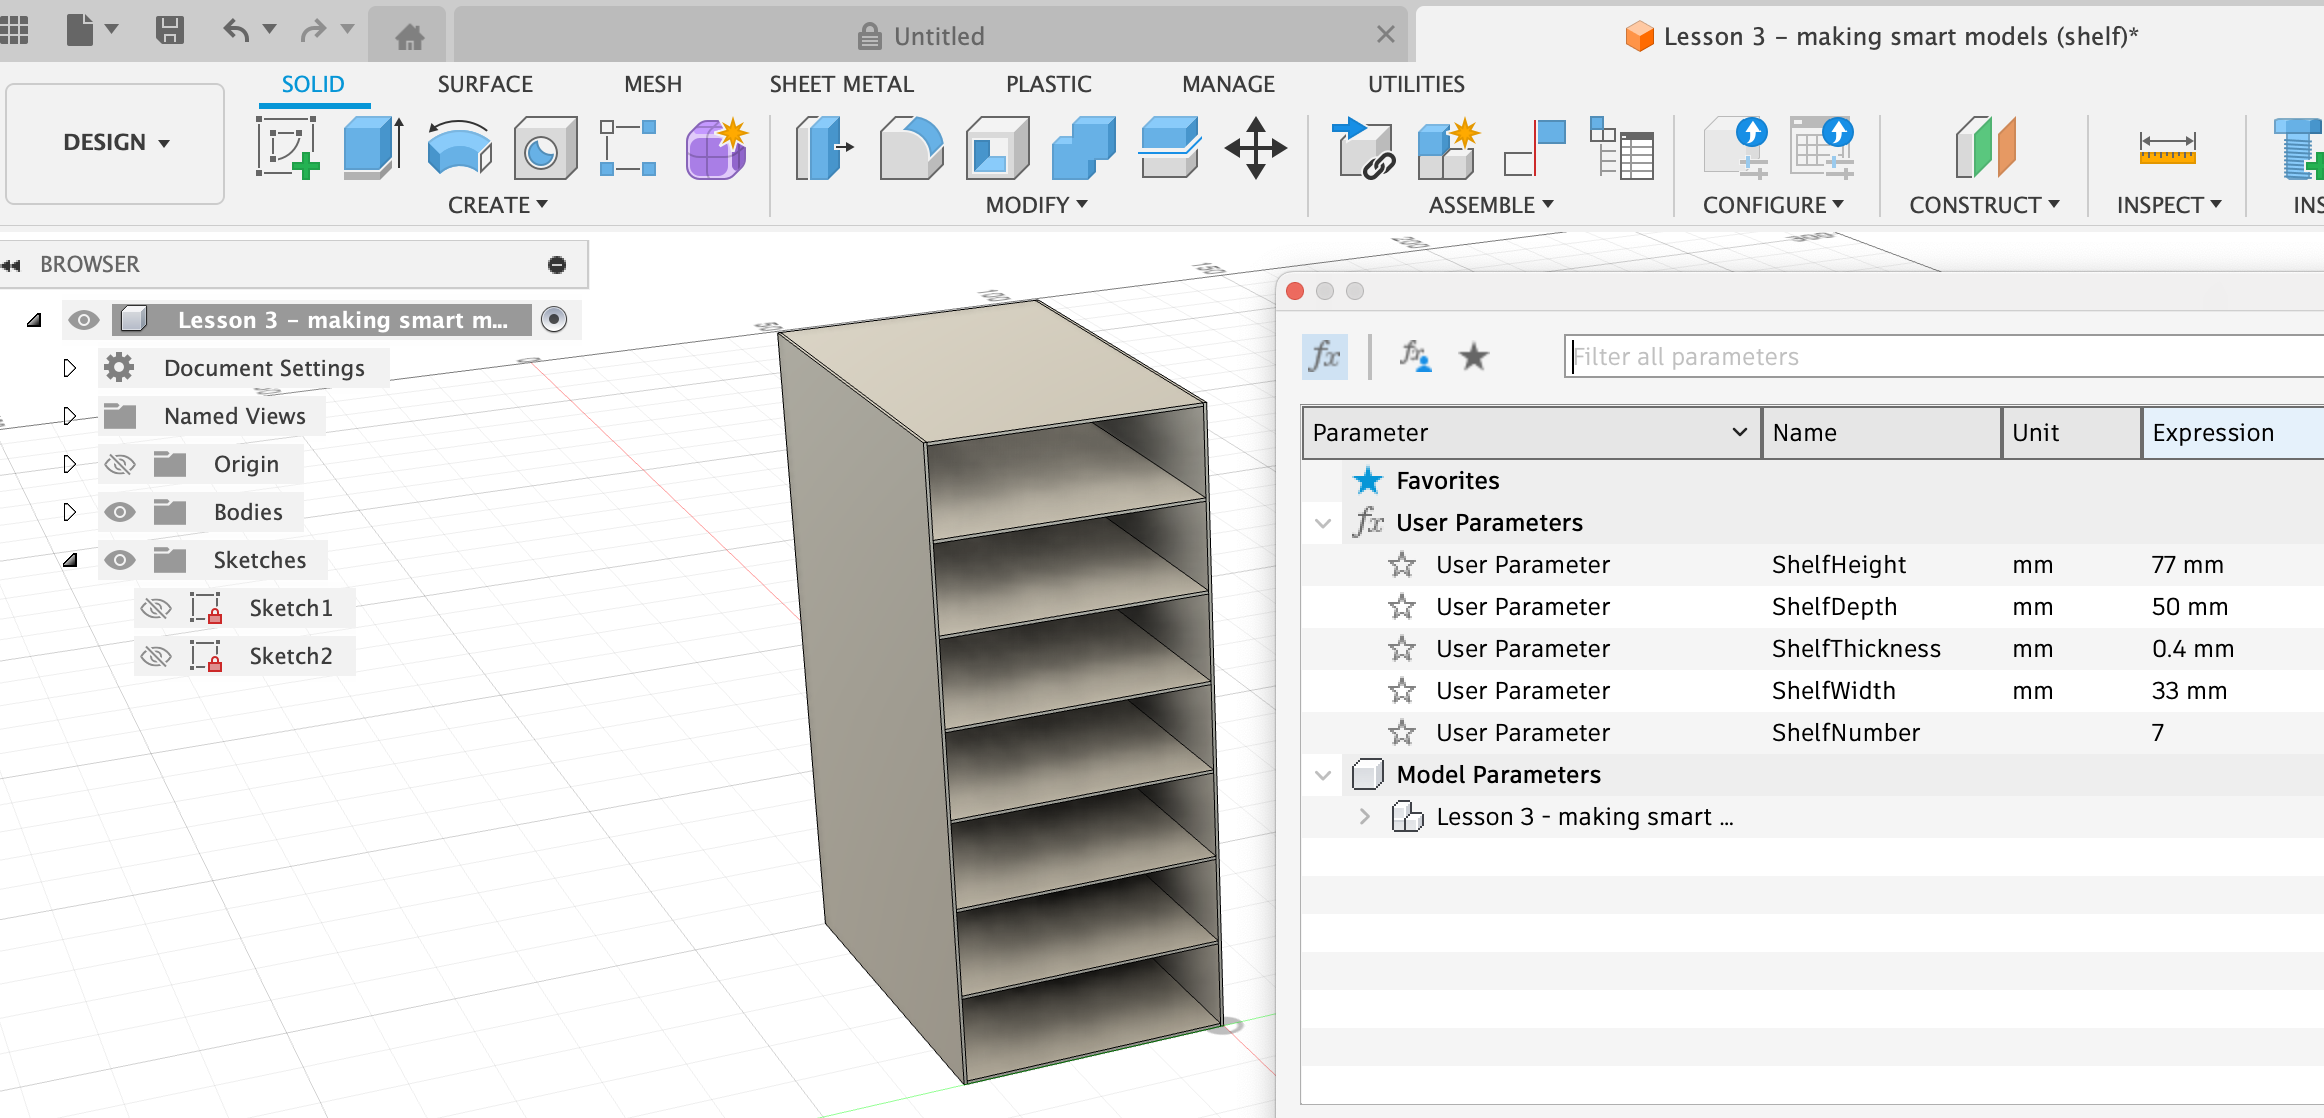
Click on tab Modify and select Change parameters. This gives us the ability to set variables
- Click on User Parameters to highlight it.
- Click on the little plus next to the input box.
- Add User Parameter:
- Name = ShelfHeight, Unit = mm, Expression = 800.
- Name = ShelfDepth, Unit = mm, Expression = 200.
- OK
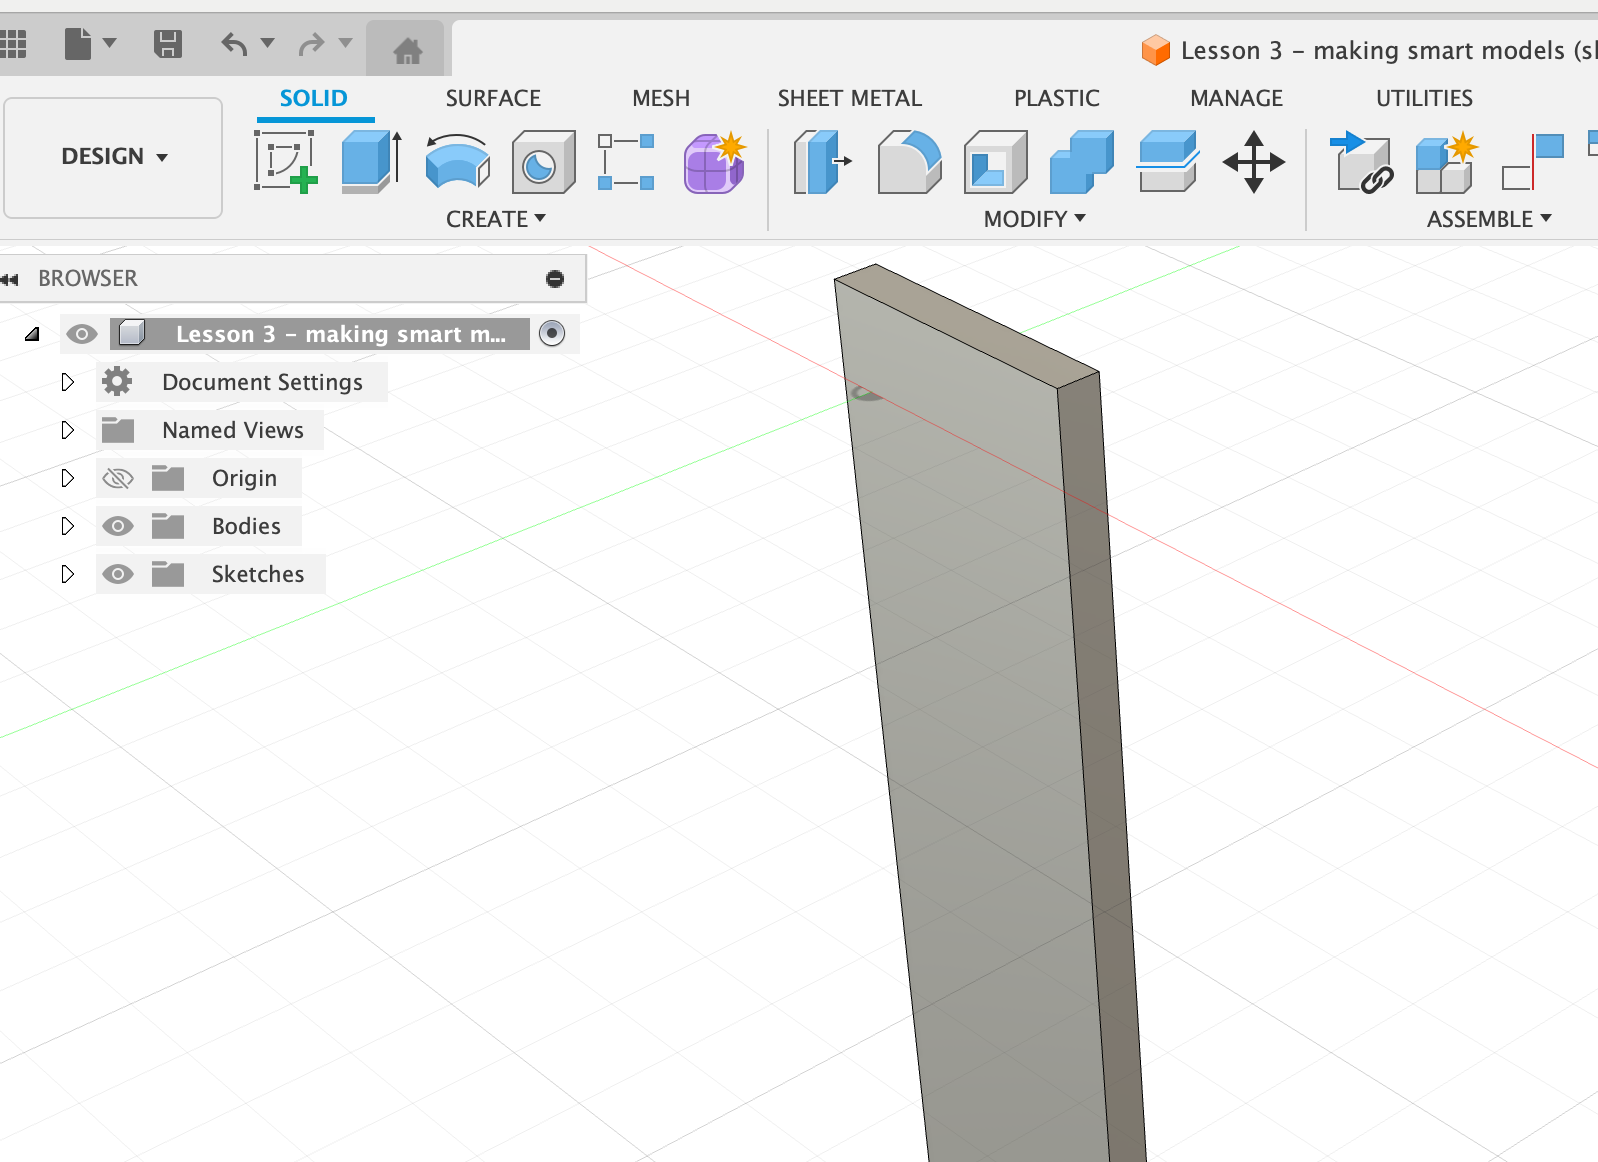
Now when creating a sketch (Create > Create Sketch > Rectangle) I can instead of typing in a number for dimenions on the side, I just start typing “Shelf…” and it shows me the options ShelfHeight and ShelfDepth to select. To switch between the two selection, use tab.
Add also a parameter ShelfThickness, Unit = mm, Expression = 30. Finish Sketch (On the Sketch Palette to the right, click Finish Sketch).
Solid > Extrude. For the distance of extrusion, select ShelfThickness.
Now if I would like to use a different material, I can just change the parameter of ShelfThickness and the model will be adapted.
Create another parameter: ShelfWidth, Unit = mm, Expression = 250.
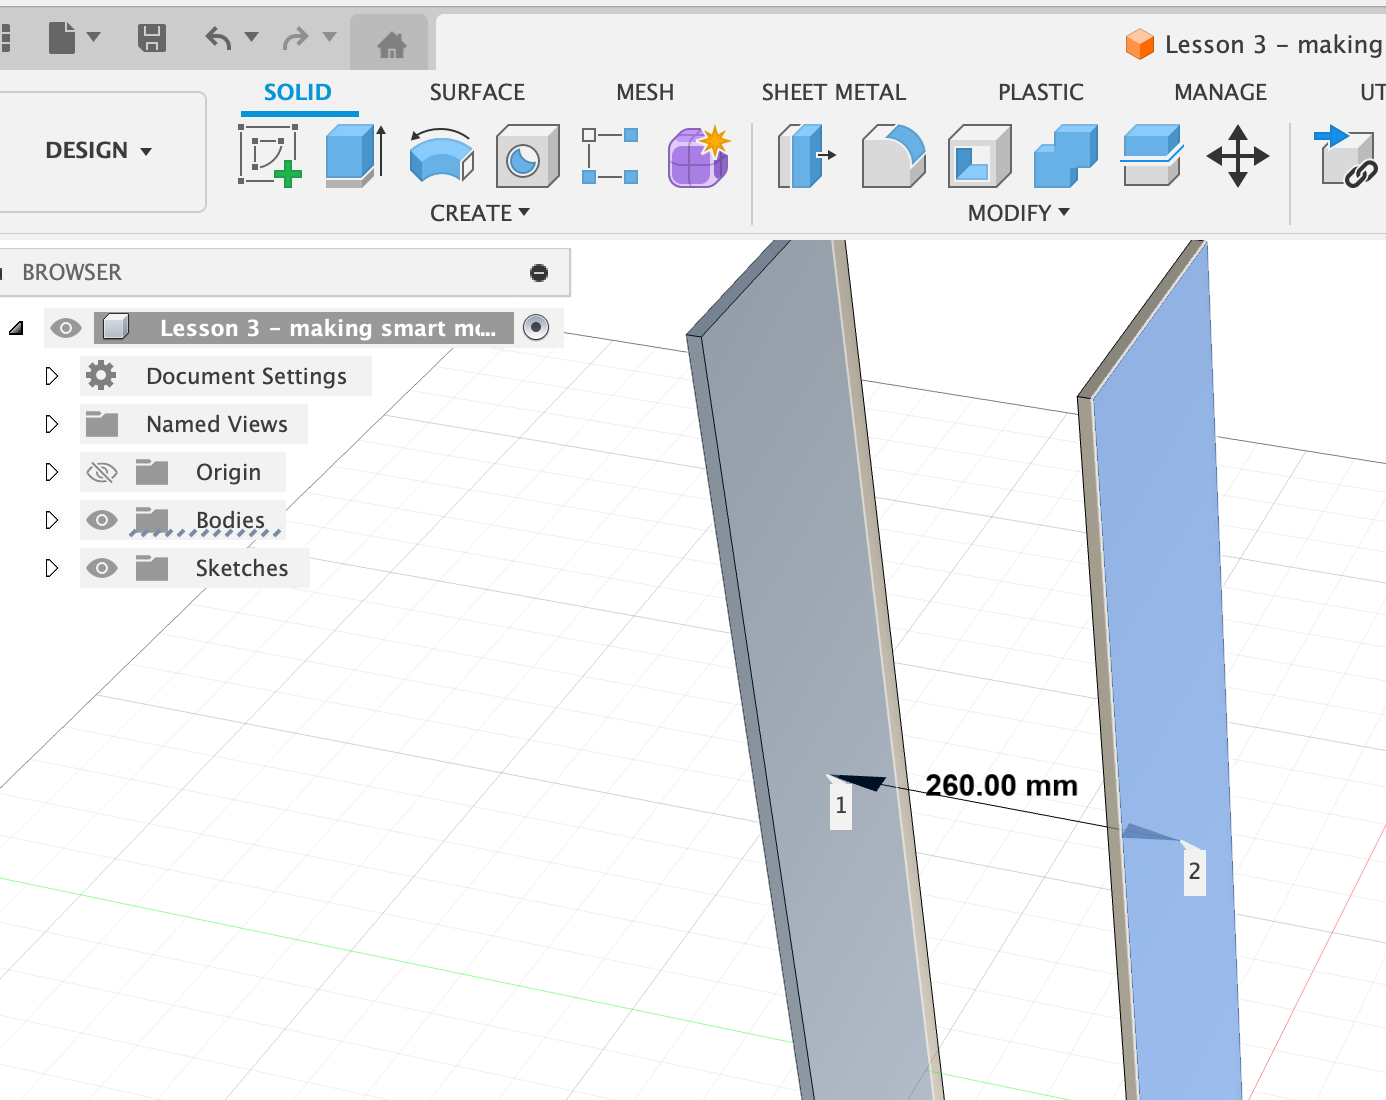
Rectangular Pattern function: Duplicates faces, bodies, features or components in a design and distributes them along linear axes in rows and columns to create a rectangular pattern. Use it to create a copy of the shelf wall object.
Select Solid > Rectangular Pattern. Then click on the shelf wall object, then select an axis in which direction you want to copy the shelf wall. For distance select “ShelfWidth-ShelfThickness”, and for the number, select 2. The reason why ShelfWidth minus ShelfThickness is that otherwise the distance is not quite right (you can check by using the Inspect tool!).
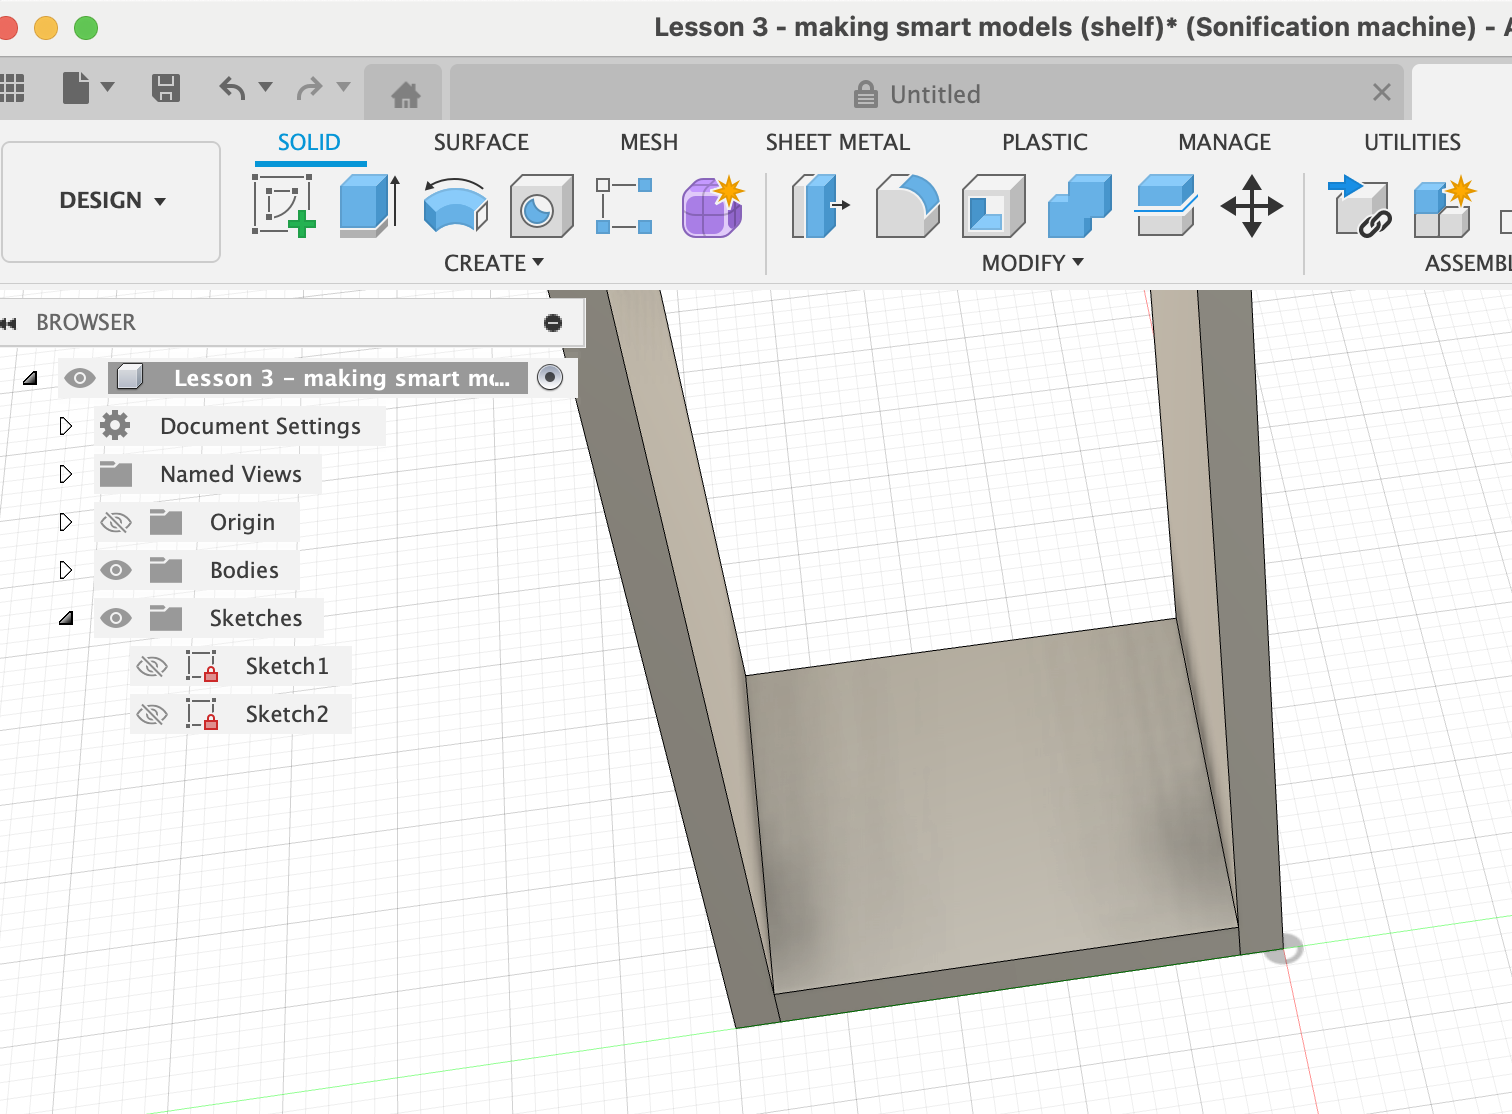
Now we’re going to add individual shelves. Create Sketch on the bottom plane. Make a rectangle with ShelfDepth and ShelfWidth parameters. However, this plate can’t be extruded yet, it’s too big (would stick into the side panels). We need to draw a few more lines in the sketch.
- Draw a line for the side panel thickness, with ShelfThickness.
- Draw a line for the inside of the side panel, with ShelfDepth. Do this on both sides of the shelf plate.
- Draw a line from the inside of the side panel to the inside of the other side panel, with ShelfWidth-2xShelfThickness.
Now Finish Sketch and test to extrude the bottom plate. If it’s still sticking into the side panels, there’s still a line missing somewhere. Go back to the sketch (e.g. by selecting the sketch in the left-hand menu) and insert a few more lines using the specified parameters.
Once the bottom panel looks good (i.e. is inside the side panels), extrude it by ShelfThickness, and select New Body.
Create a parameter ShelfNumber, no units, 4. Rectangular Pattern, select the bottom shelf and the upwards direction. Length should be ShelfHeight-ShelfThickness and number should be ShelfNumber+1.
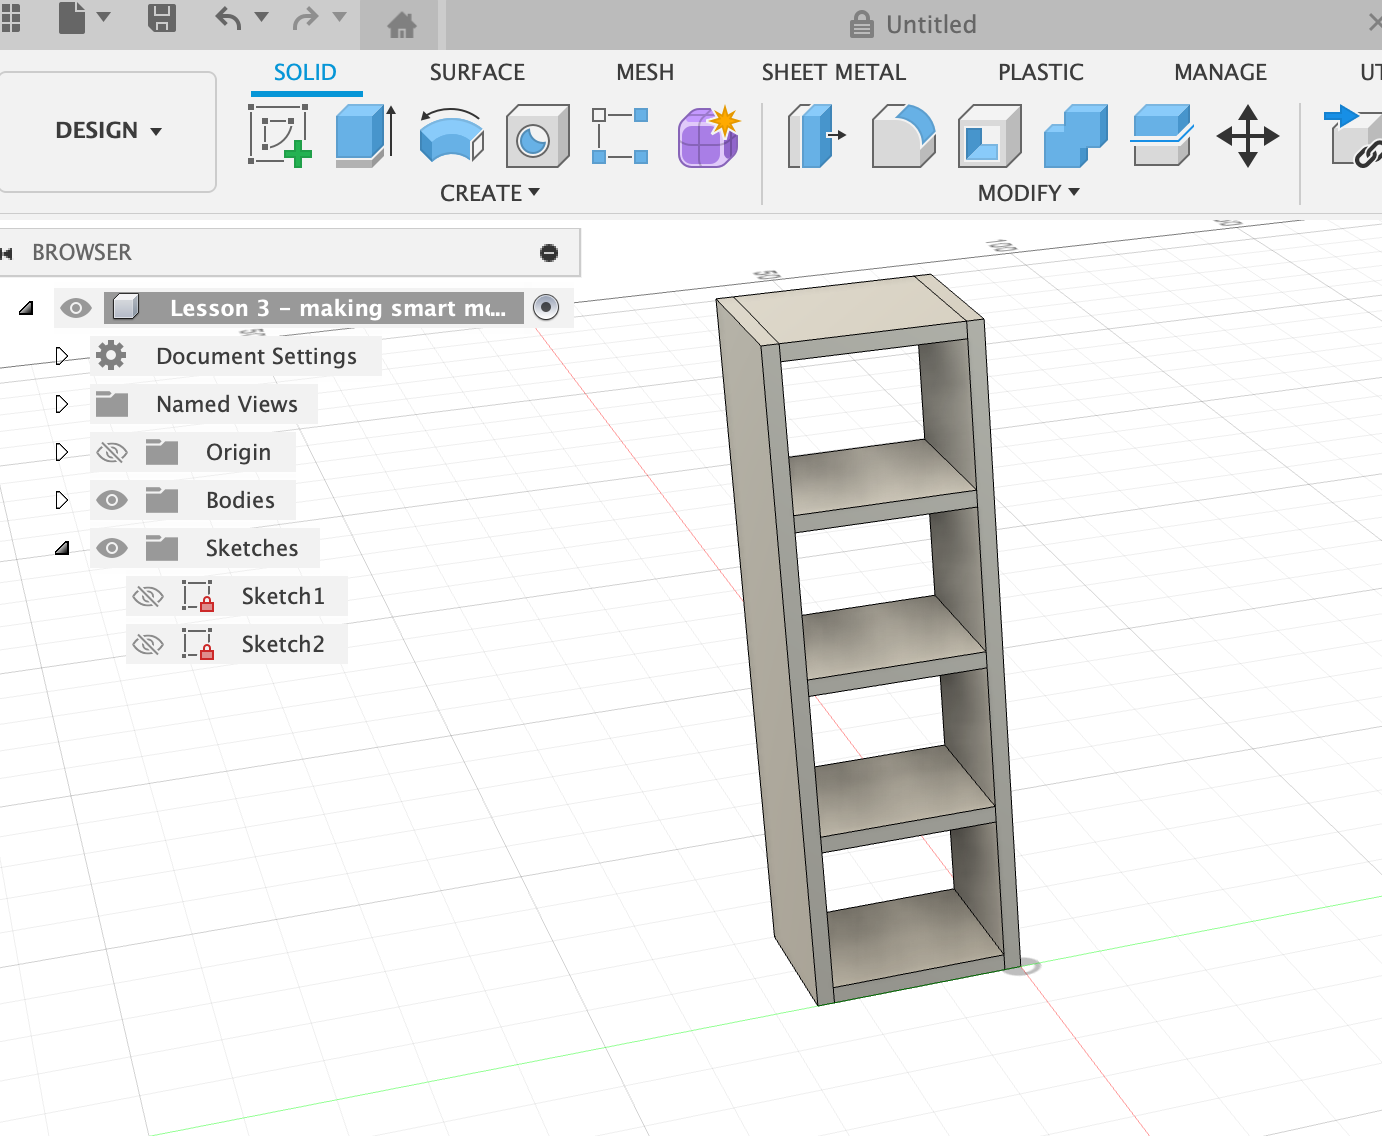
Now if you want to change any of the parameters, that’s very easy to do and the object will just adjust: