https://www.youtube.com/watch?v=-_ohNAAQ-mU
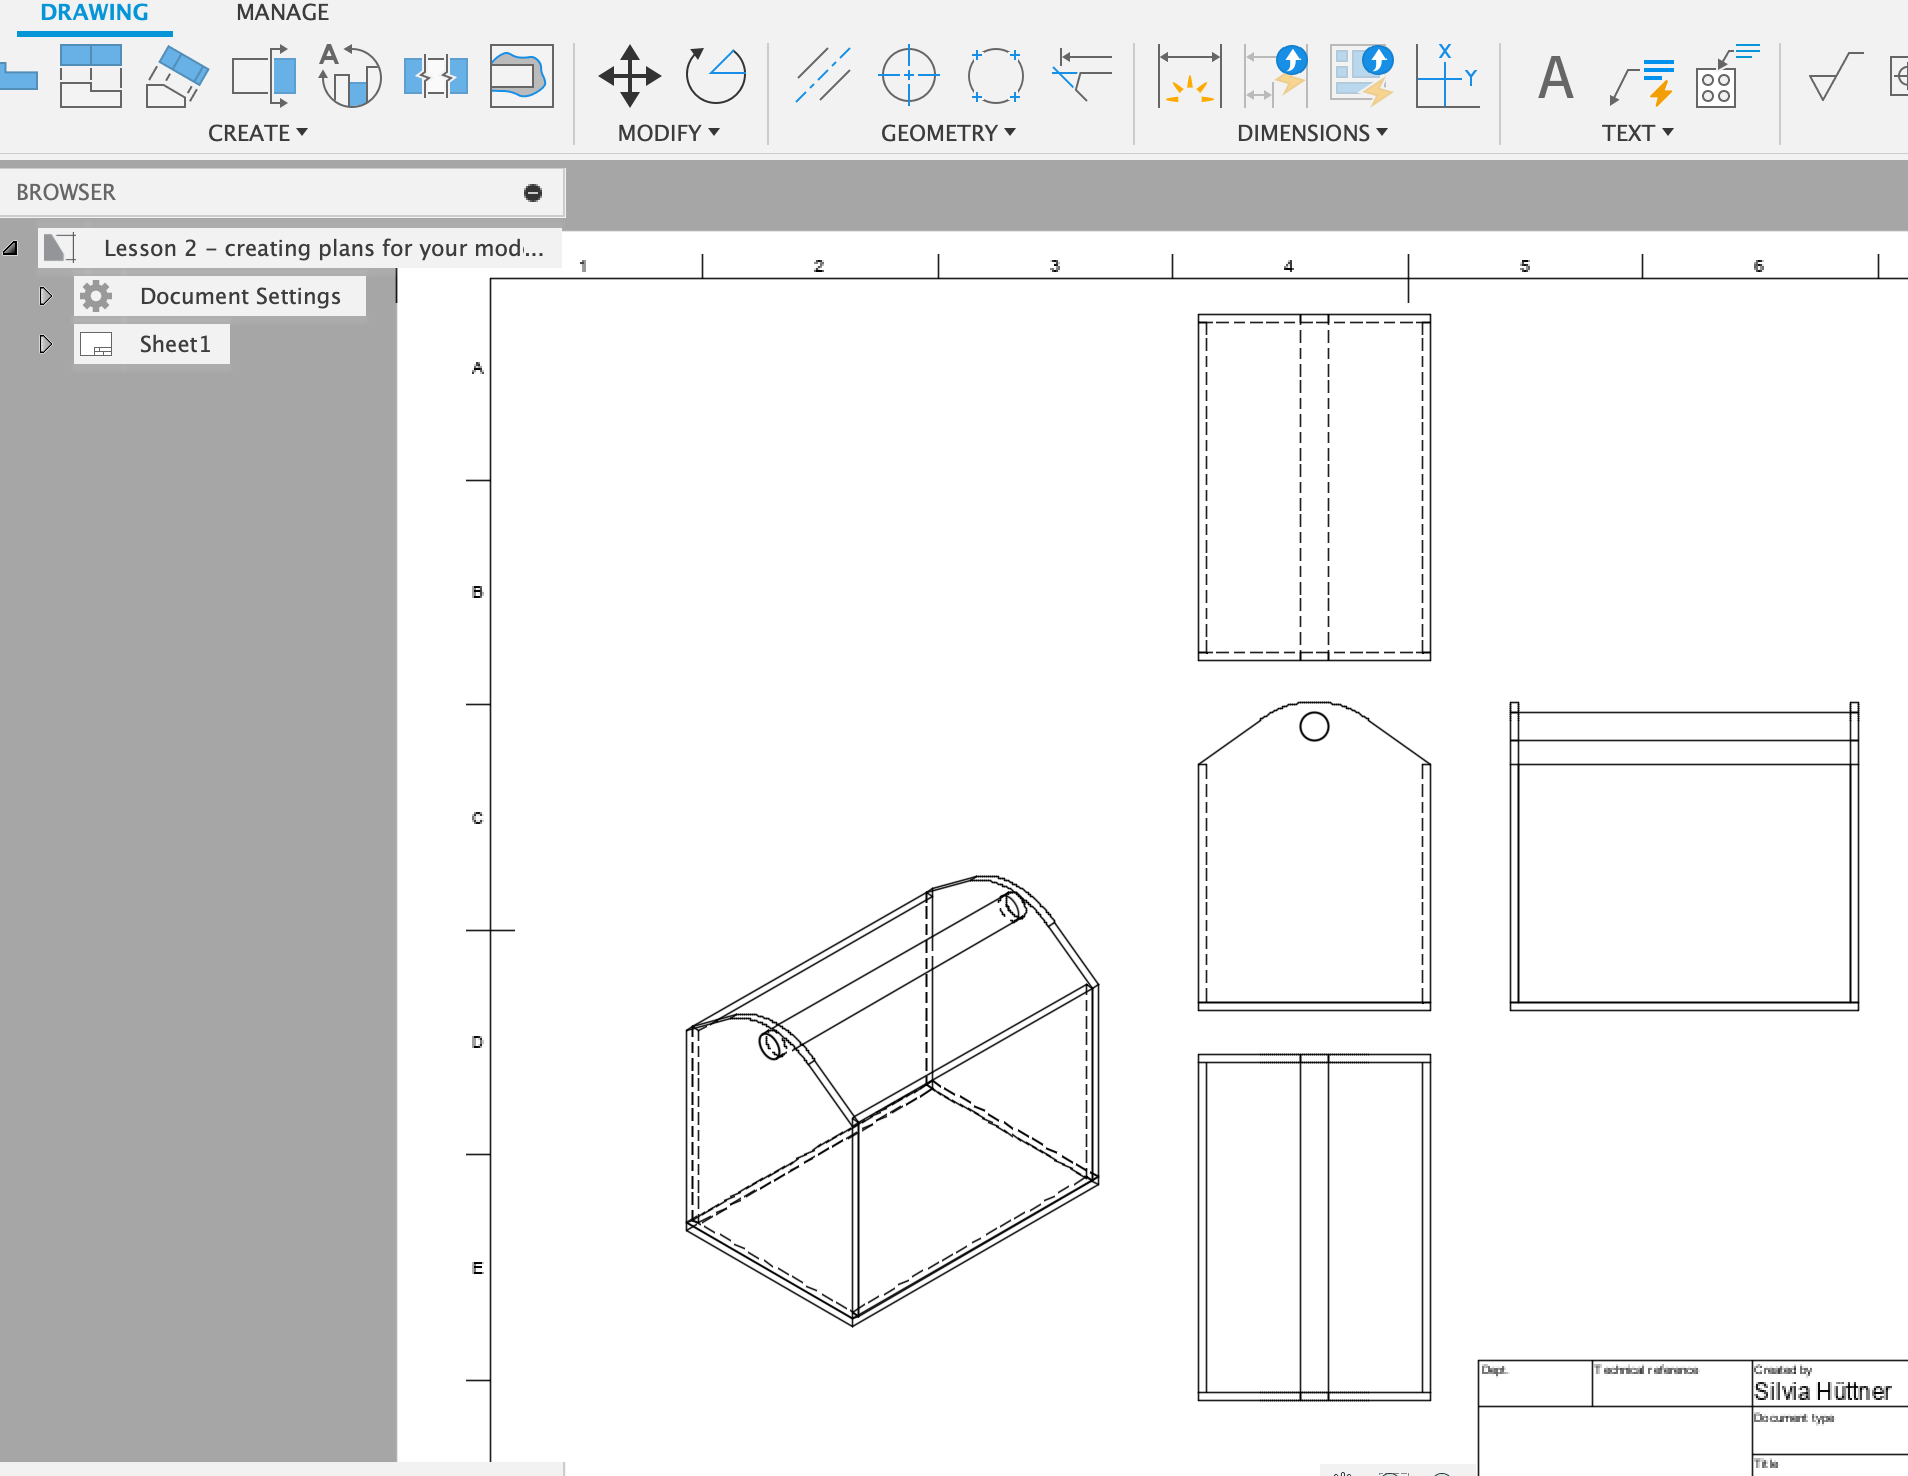
In the file from Lesson 1: Go into Drawing workspace. Select From Design. A blank page appears that lets you place the front view of your design. Place it near the left top corner. In the Drawing View dialog box to the right, you can select different view options, e.g. Orientation (Front, Top, etc.), Style (with or without visible edges, shaded, etc.). Click Close.
Dimensions Insert dimensions onto the drawing by clicking the Dimensions tab, then clicking on Dimensions and selecting two points. Draw out the labelling to a place where you want it.
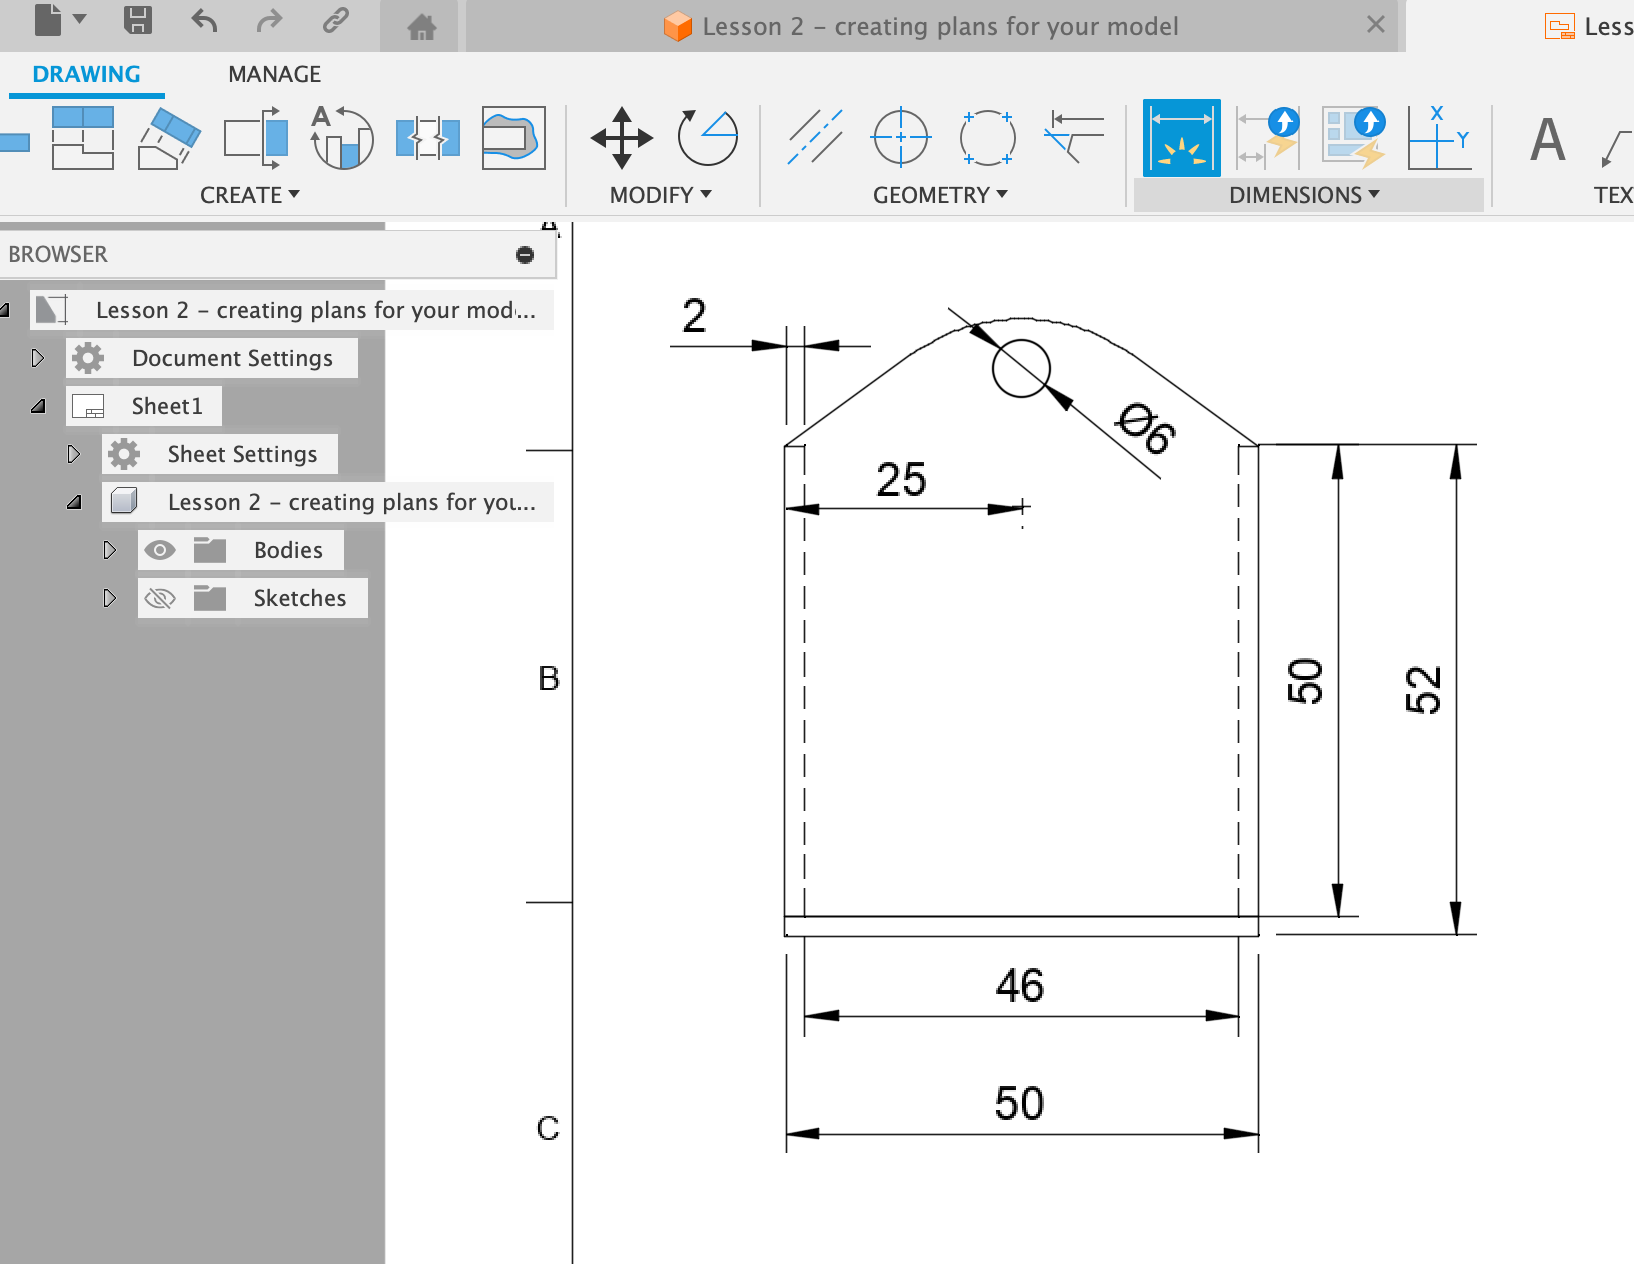
To place dimensions more nicely and avoid overlaps, the Dimensions drop-down menu has the option Arrange dimensions that lets you select two dimensions and place them
Document settings In the menu on the left you can set font size, units, line width etc. of the labelling.
To add another view of the same object on the same page, click in the top left corner in the Drawing tab on Base view and click on a free spot on the paper. This will insert another instance of the model, and lets you then adjust the viewpoint, style of presentation, scaling, etc. as in the drawing before.
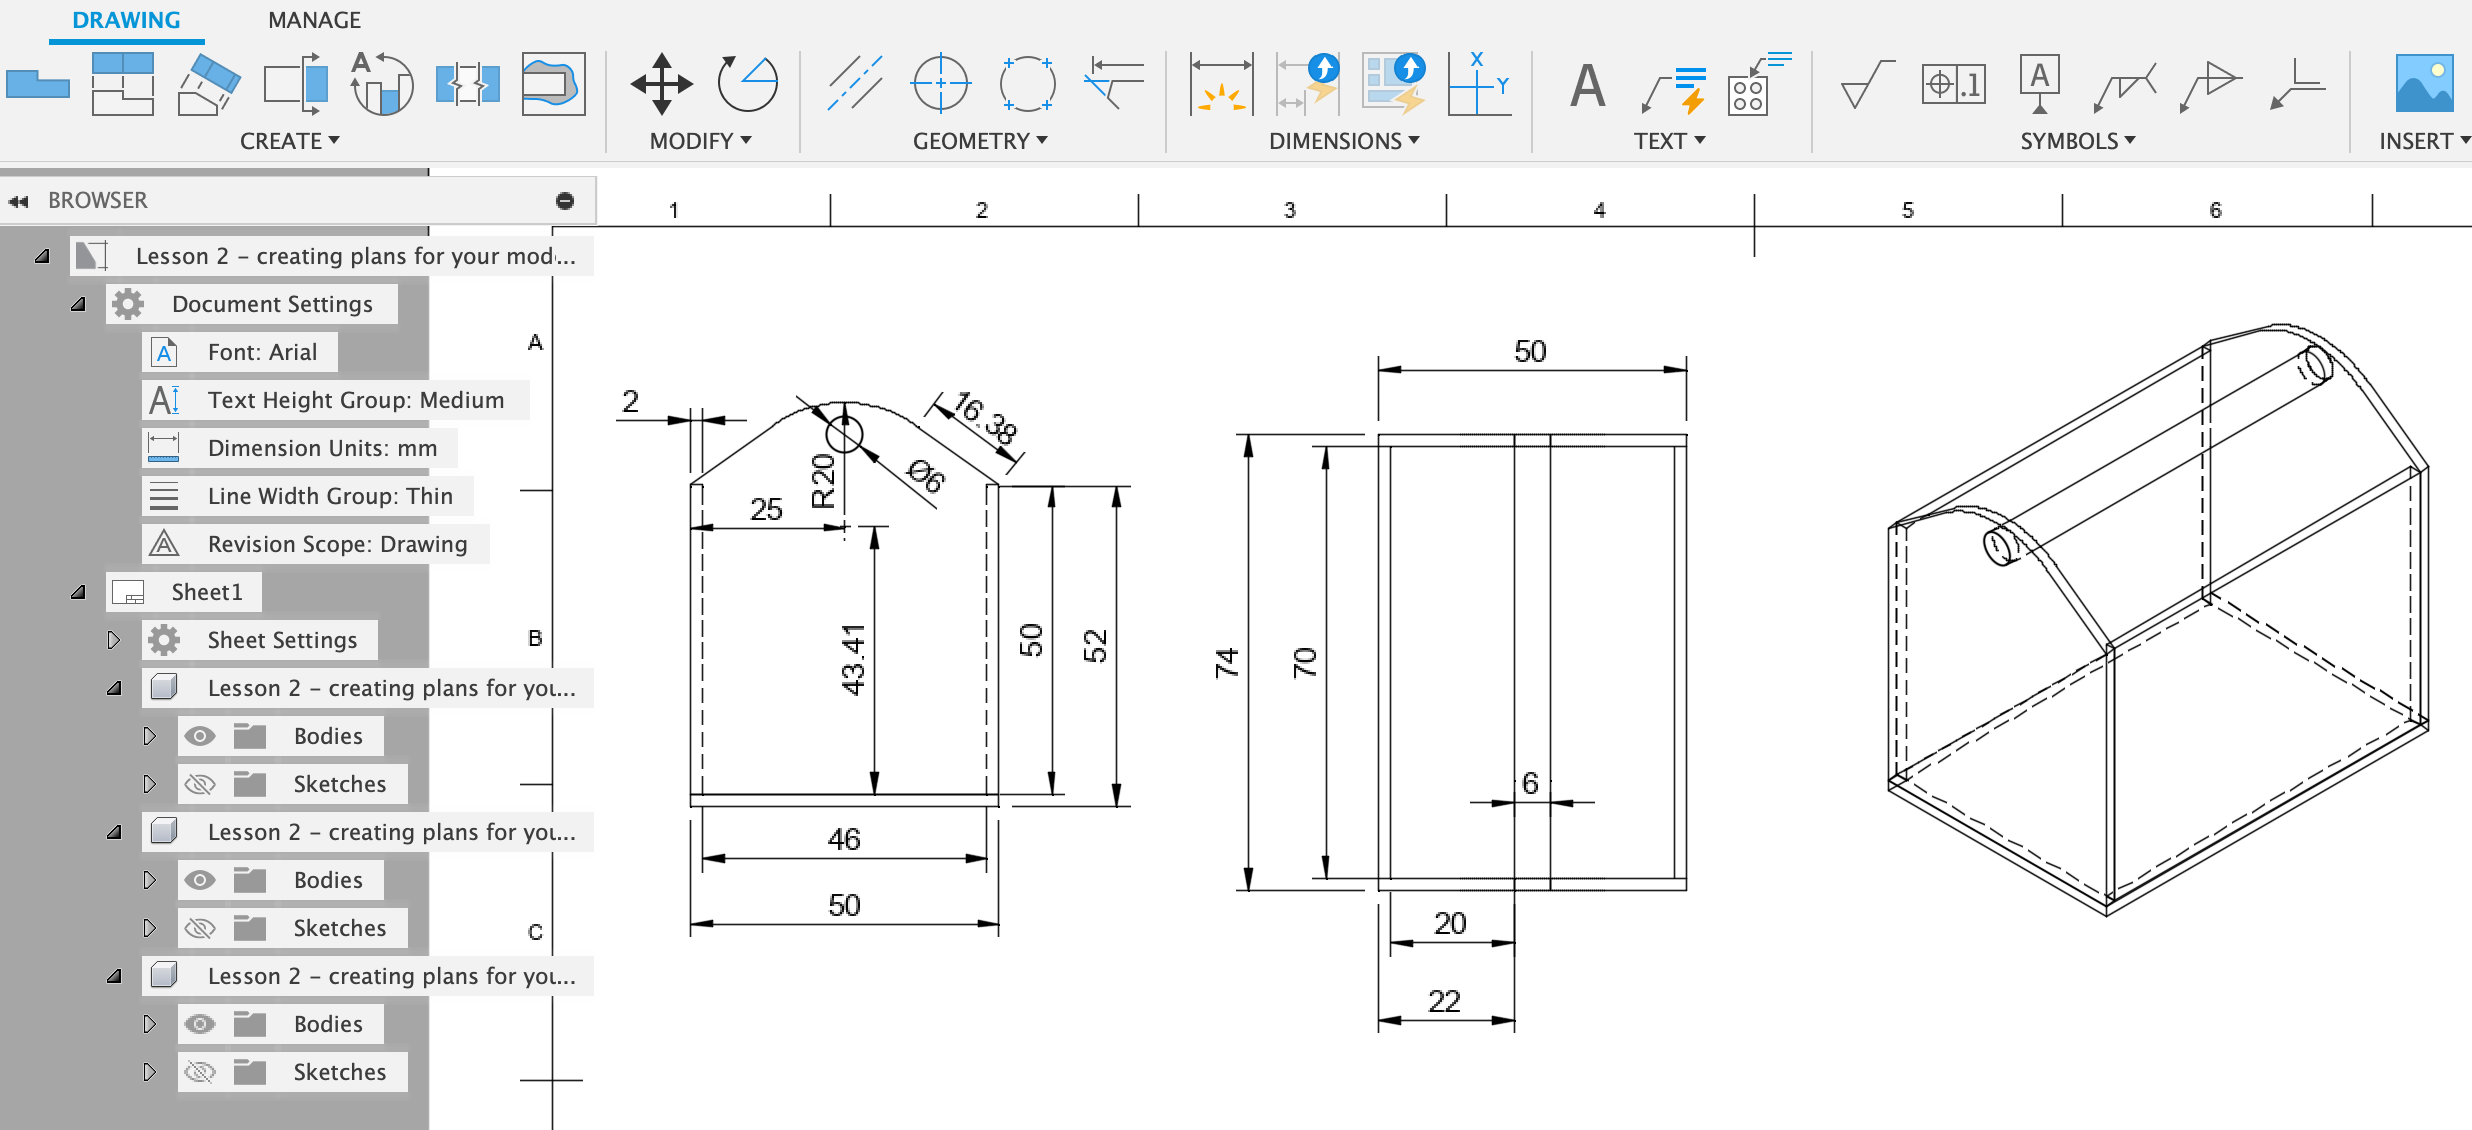
Even better: Insert the object with Base view. Then click on Projected view and the placed object to create different aligned views and perspectives of the same object.